This tutorial is written for complete beginners with no technical background at all. The goal is to help you build your own blog step by step, without assuming you already know how any of this works.
I recommend reading the whole article once before you start.
(I was using Windows 10 1903 at the time, so this tutorial is written for Windows users.)
Motivation
I had wanted to build a blog for a long time, but never actually got around to doing it.
Then one weekend, while casually browsing online, I came across a tutorial on using Hexo + GitHub to build a blog. On impulse, I decided to give it a try.
Riding that burst of motivation, I went from noon all the way into the evening and spent more than ten hours building what the tutorial described as “a personal site hosted on GitHub in ten minutes.”
To be fair, the tutorial itself is good, and if everything goes smoothly you probably really can finish very quickly.
But my skill level was below zero, so I stepped on every strange beginner trap I could possibly find and burned a lot of time in the process.
People with experience often skip tiny details because, to them, “everyone knows that already.”
But those tiny details are exactly what trip up beginners who are eager to try.
So I wrote this post to record the setup process and all the pits I fell into, in the hope that it might help other beginners get a personal site online with less pain.
Overall Flow
Now for the main part: how to build a website with Hexo + GitHub.
At a high level, the workflow looks like this:
-
Preparation
- Install Node.js and Git
- Install Hexo
-
Build the blog locally
- Create the site folder
- Generate pages
- Run locally
-
Host on GitHub
- Create a GitHub account and repository
- Connect Git and GitHub
- Push the local site to GitHub
-
Celebrate
If you do not know those terms yet, here are a few quick explanations. Do not worry if they still feel fuzzy. You can still follow the steps.
What is Hexo?
Hexo is a fast, simple, and efficient blog framework (Hexo docs).
You can think of it like applying a template when making slides: Hexo helps you generate a website locally, then you host the generated files on GitHub.
What is Node.js?
I don’t fully understand it. Here, it’s a runtime/component required for Hexo.
What is Git?
Git is a version control tool. In this tutorial, you can treat it as a terminal that helps control other tools.
What is GitHub?
GitHub is a hosted platform that uses Git for version control (Wikipedia).
For this tutorial, you can treat GitHub as a public cloud drive: you create a repository and upload your site there, and then others can access it.
Next, I’ll use Windows 10’s built-in Sandbox to demonstrate building a blog on a fresh Windows system.
Preparation
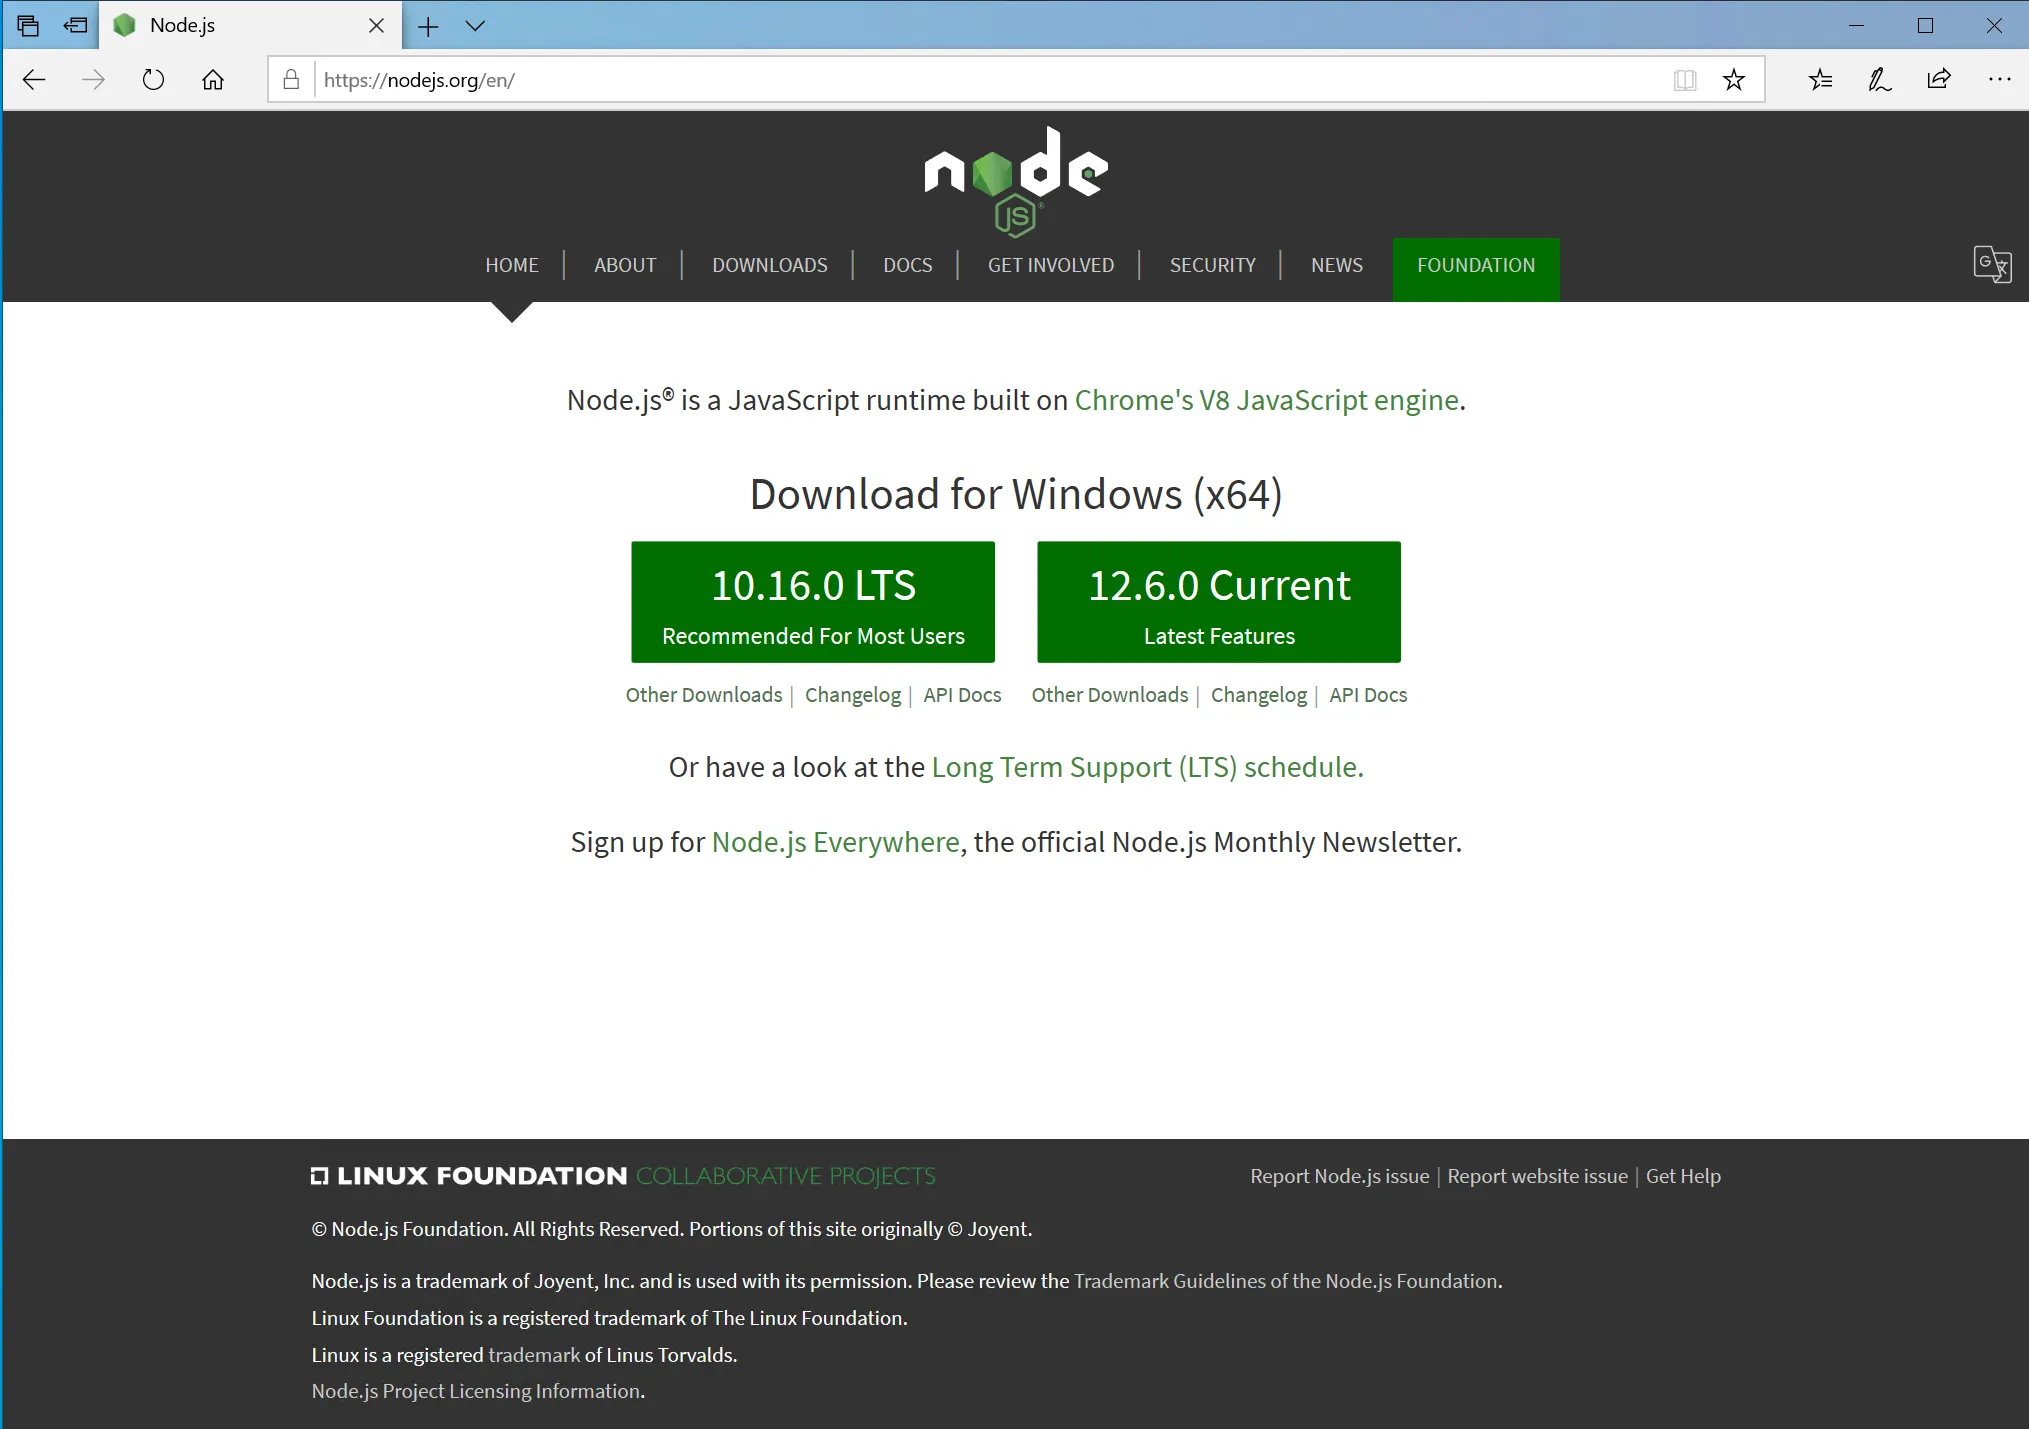
Install Node.js
Go to the Node.js website, click the left 10/16/0 LTS button to download.
Install with all defaults.
Install Git
Click the Git download link to download.
But for obvious reasons, the download may be slow. You can also use this mirror: Git for Windows (China mirror) and pick the latest 64-bit Git for Windows Setup.
Install with all defaults.

Install Hexo
With the required components installed, it is time to install Hexo.
This part is simpler than it looks.
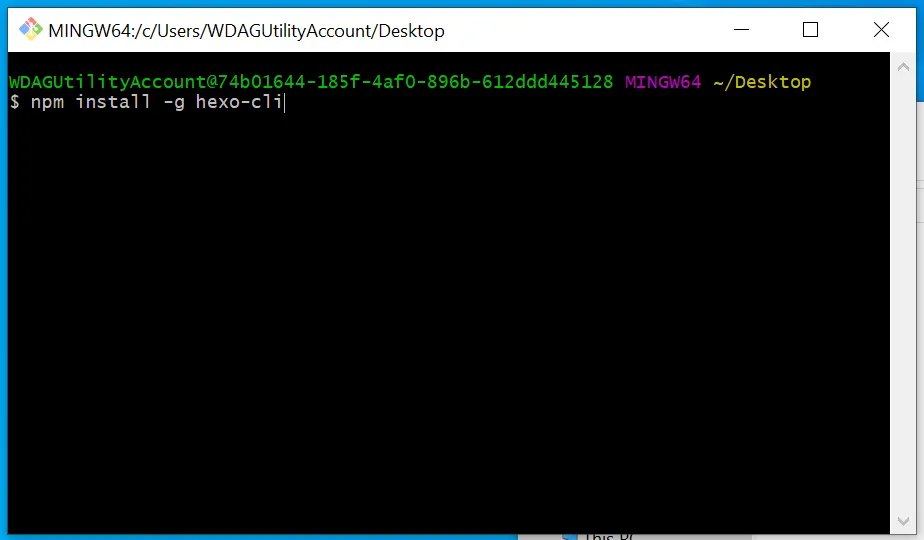
Right-click anywhere, for example on an empty part of the desktop, and choose Git Bash Here.
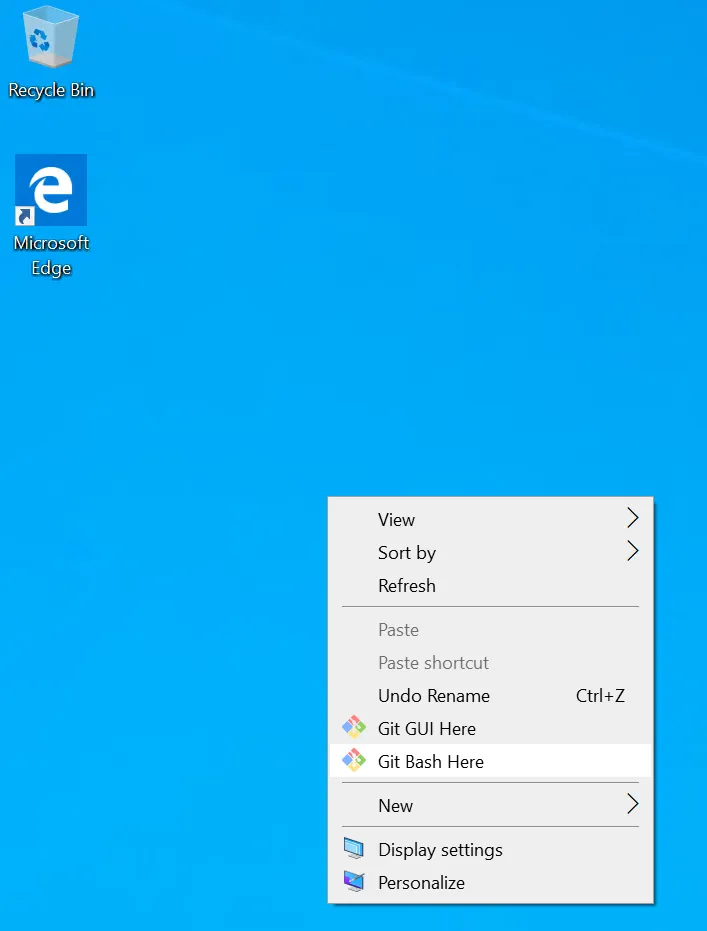
That opens Git Bash. It looks like a scary black command-line window, but in practice you only need to type one command.
In the black window, you’ll see the cursor blinking after a $ symbol.
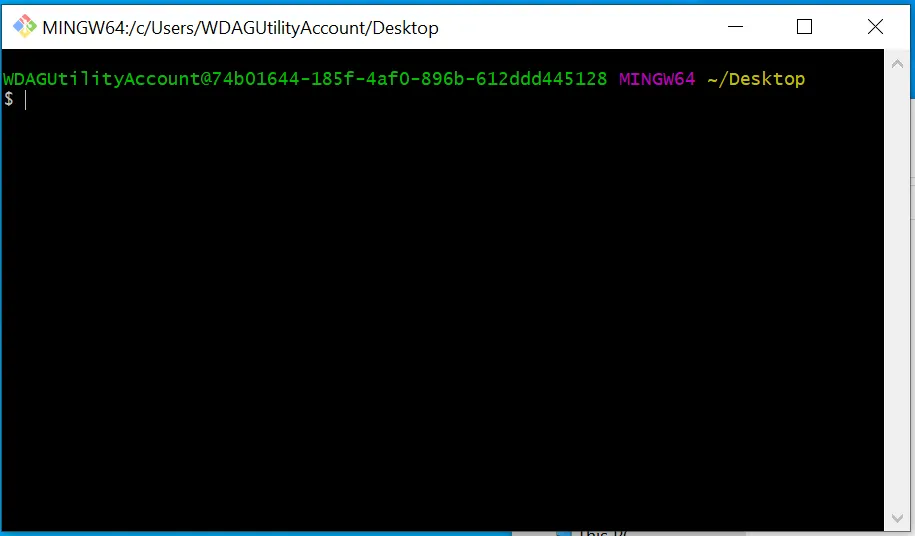
Type:
npm install -g hexo-cli
The window will look like this:
Press Enter. At first it may look like nothing happened and the cursor just moved to the next line.
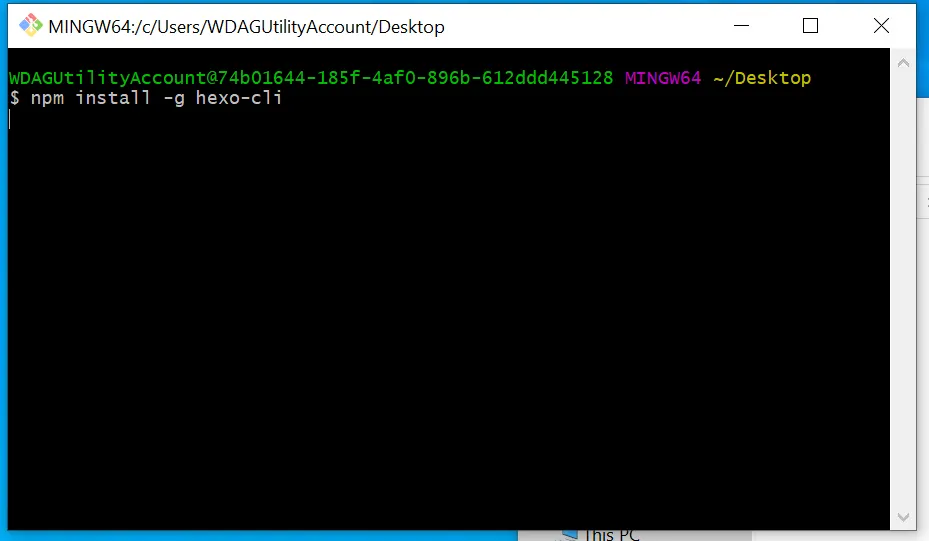
But Hexo is actually installing in the background. Give it a little time, depending on your network.
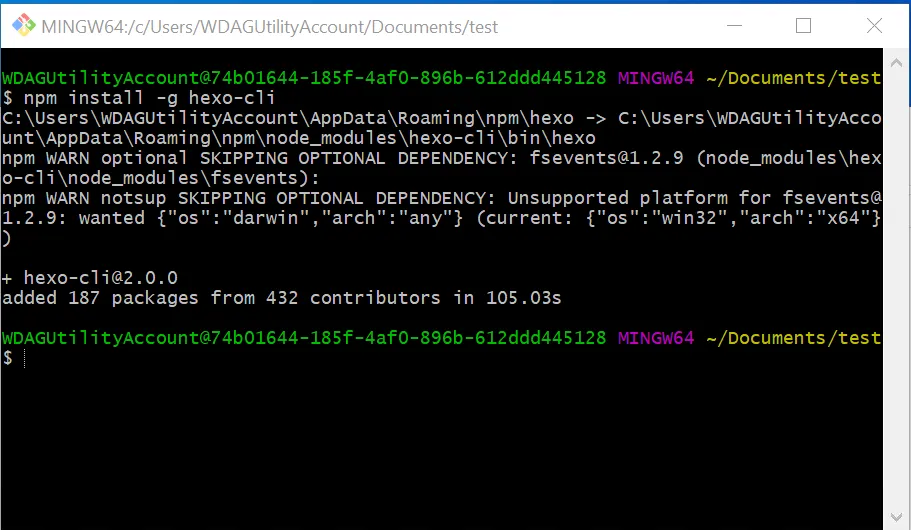
When it finishes, you should see a message saying something like hexo-cli 2.0.0 was installed in 105.03s.
That takes care of the preparation. Next comes building the blog locally.
Build Locally
Initialize the Folder
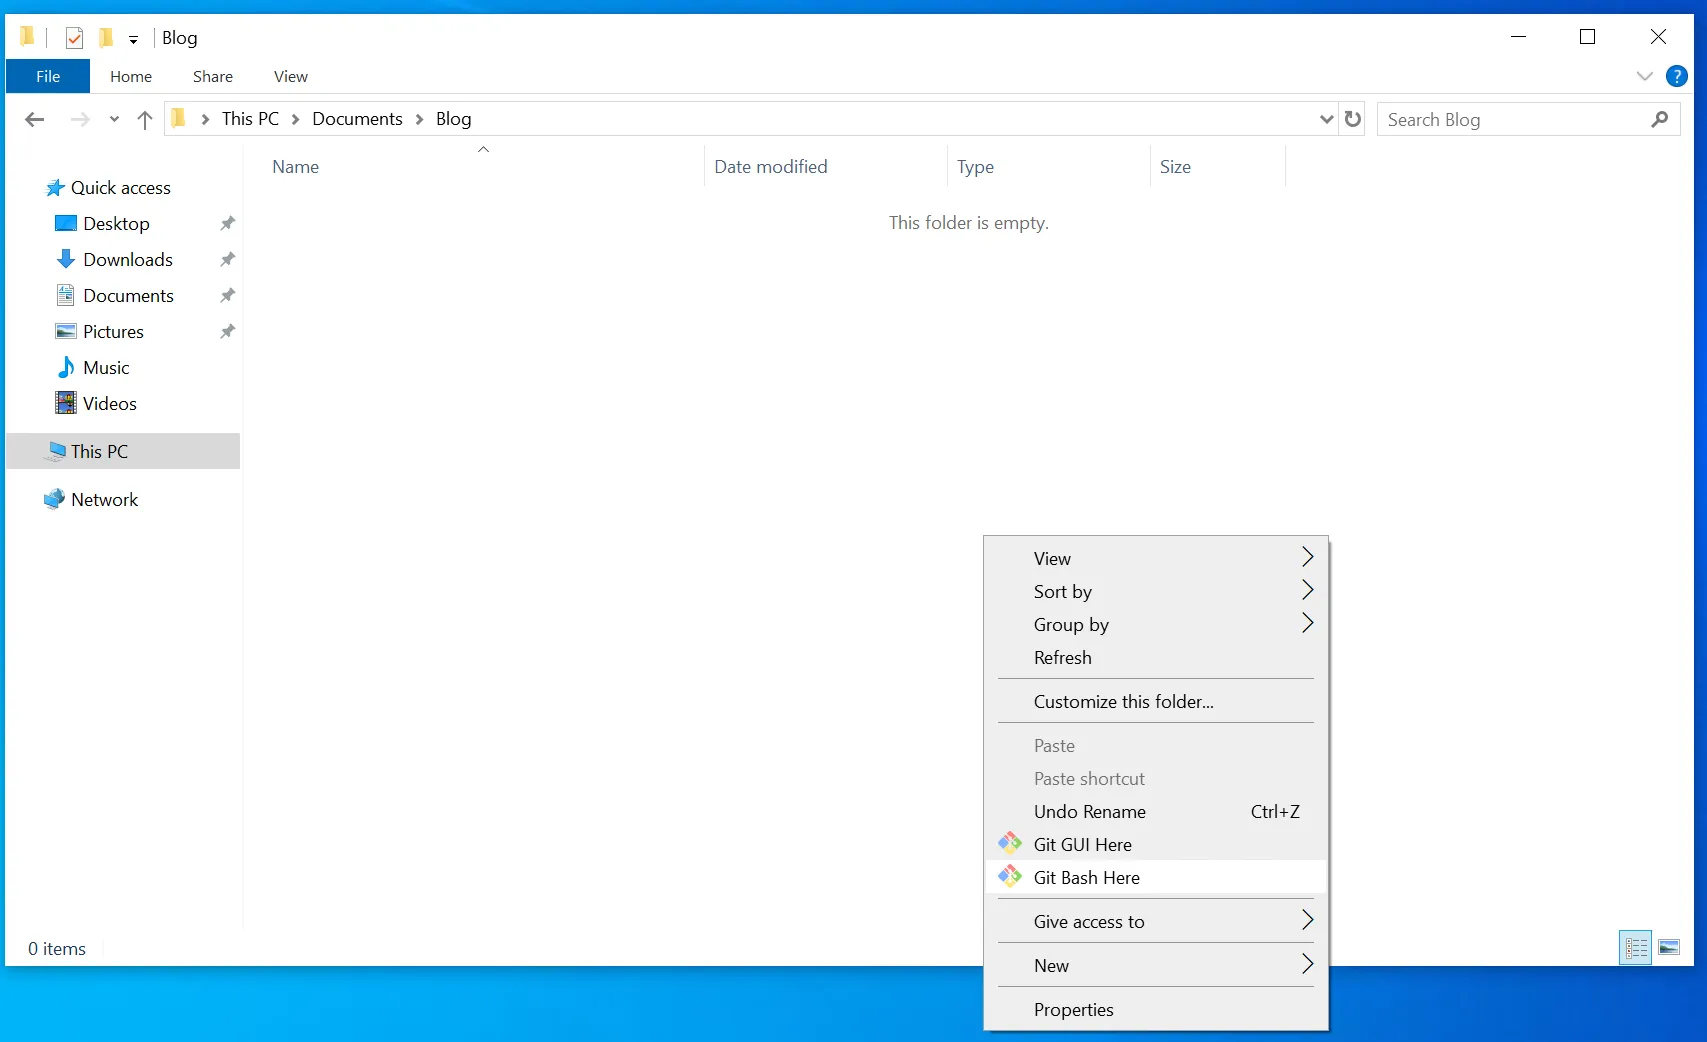
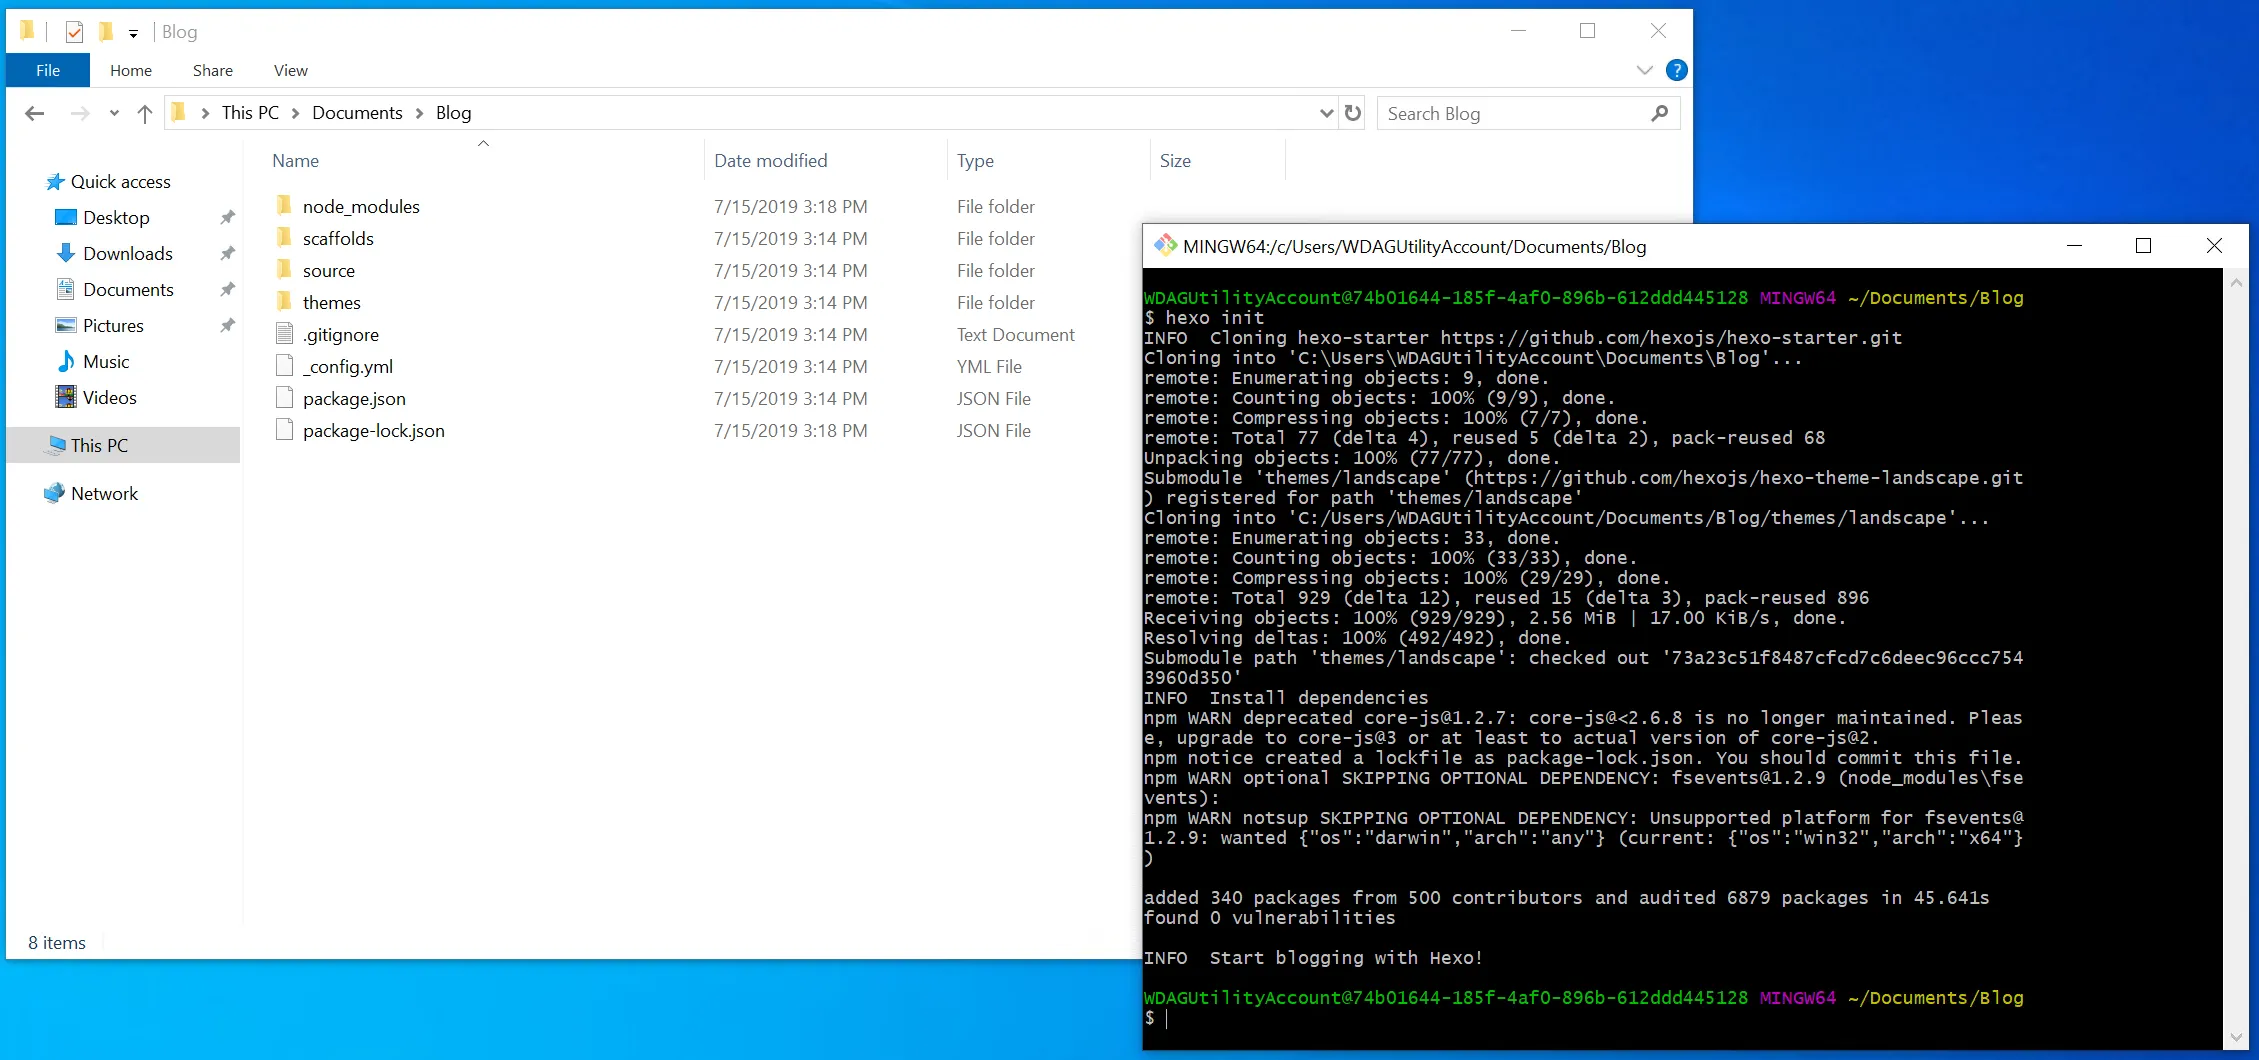
- First, create a folder to hold all the blog files. You can put it anywhere you want. For example, I created a folder called
BlogunderDocuments. - Open the empty folder, right-click, and click
Git Bash Here.
- Same black window again. This time it is even simpler: type
hexo initand press Enter.
That will initialize theBlogfolder and generate the skeleton files for the site. It may take a while, so just wait.
- After a few minutes, initialization should be done. You’ll see many new files in the folder.
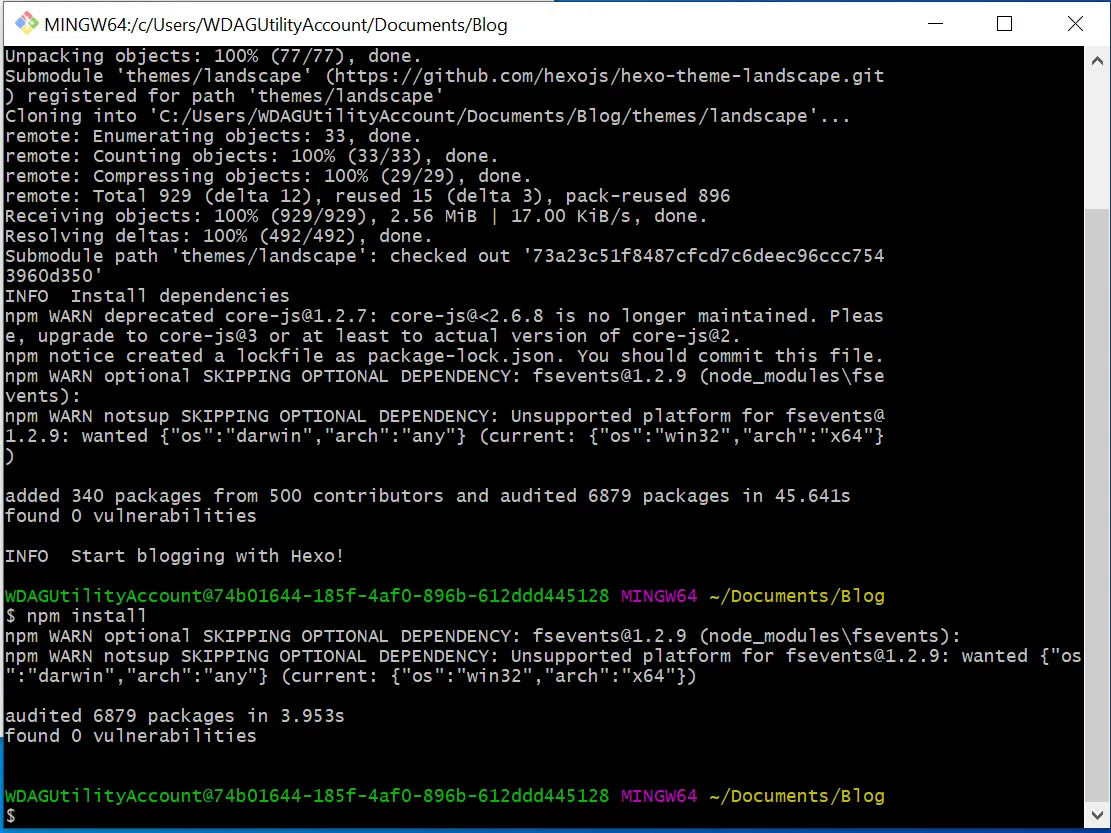
- Next, do not close the window yet. Type
npm installand press Enter.
This step should be much quicker. You may see a couple of warnings, but they usually do not matter here.
Generate and Serve
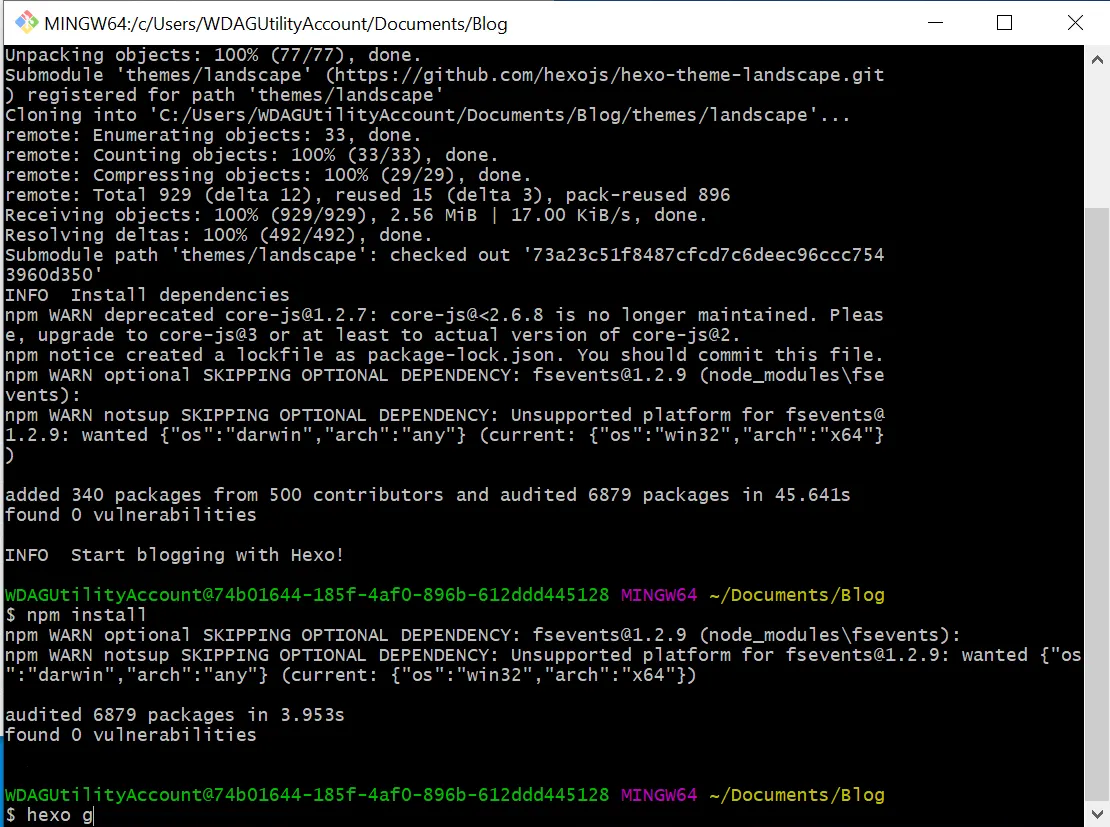
- Type
hexo gand press Enter.
(hexo gis short forhexo generate: it generates the static pages.)
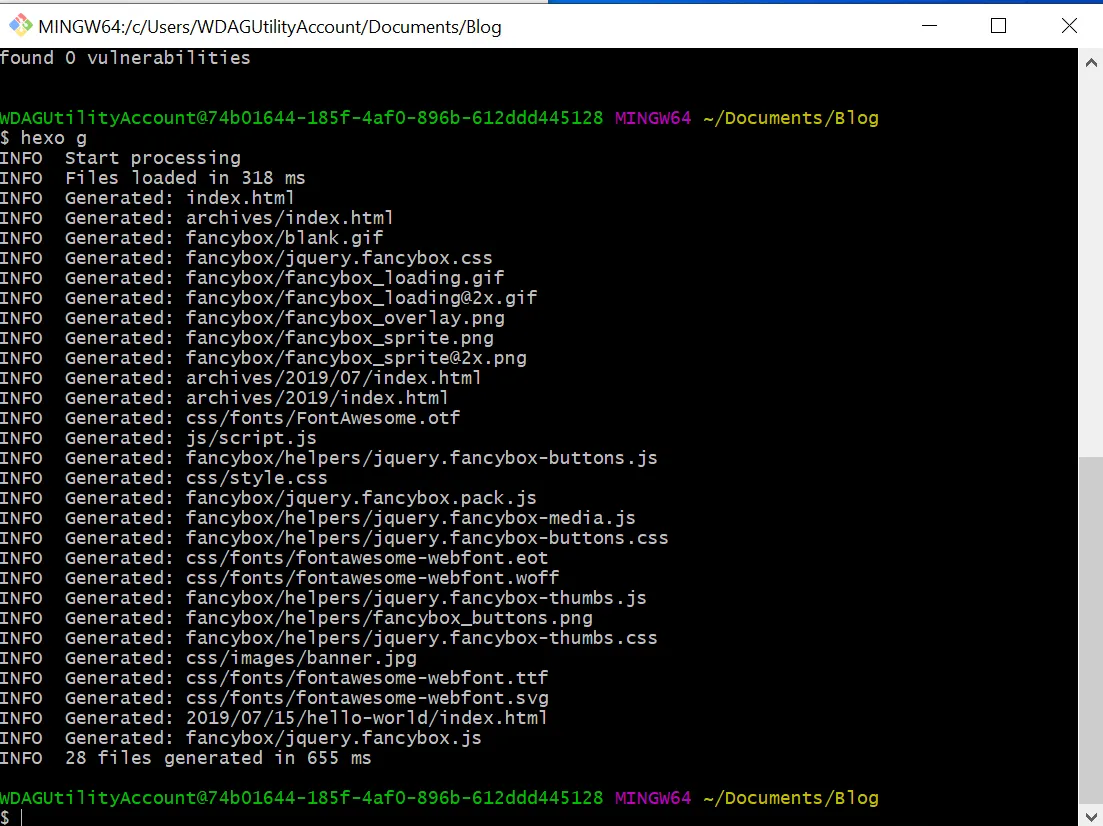
- The window prints a bunch of output.
- Type
hexo sand press Enter.
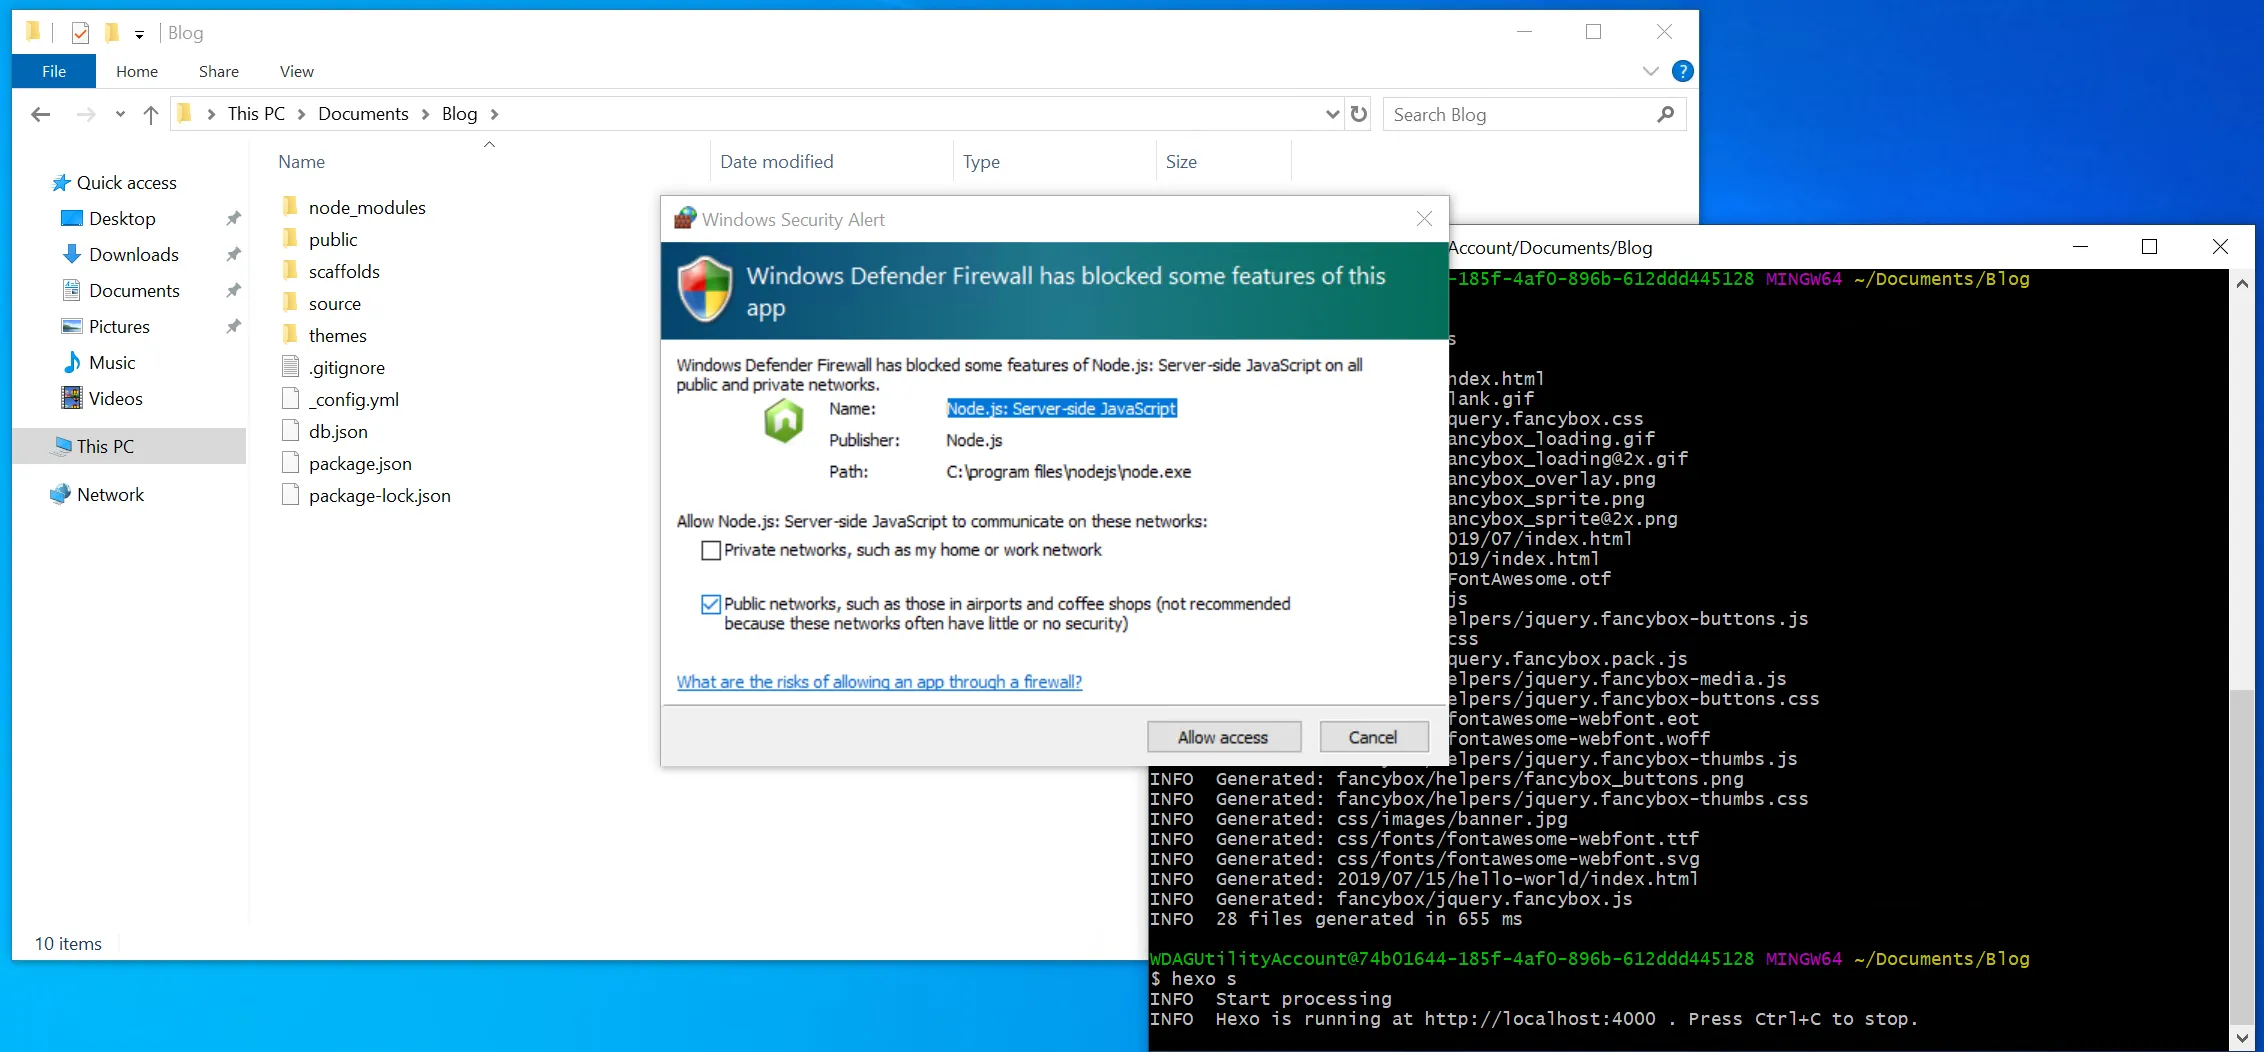
(hexo sis short forhexo server: it serves the generated pages locally.) - Windows will pop up a prompt asking whether to allow Node.js network access. Allow it.
In Git Bash you’ll see:
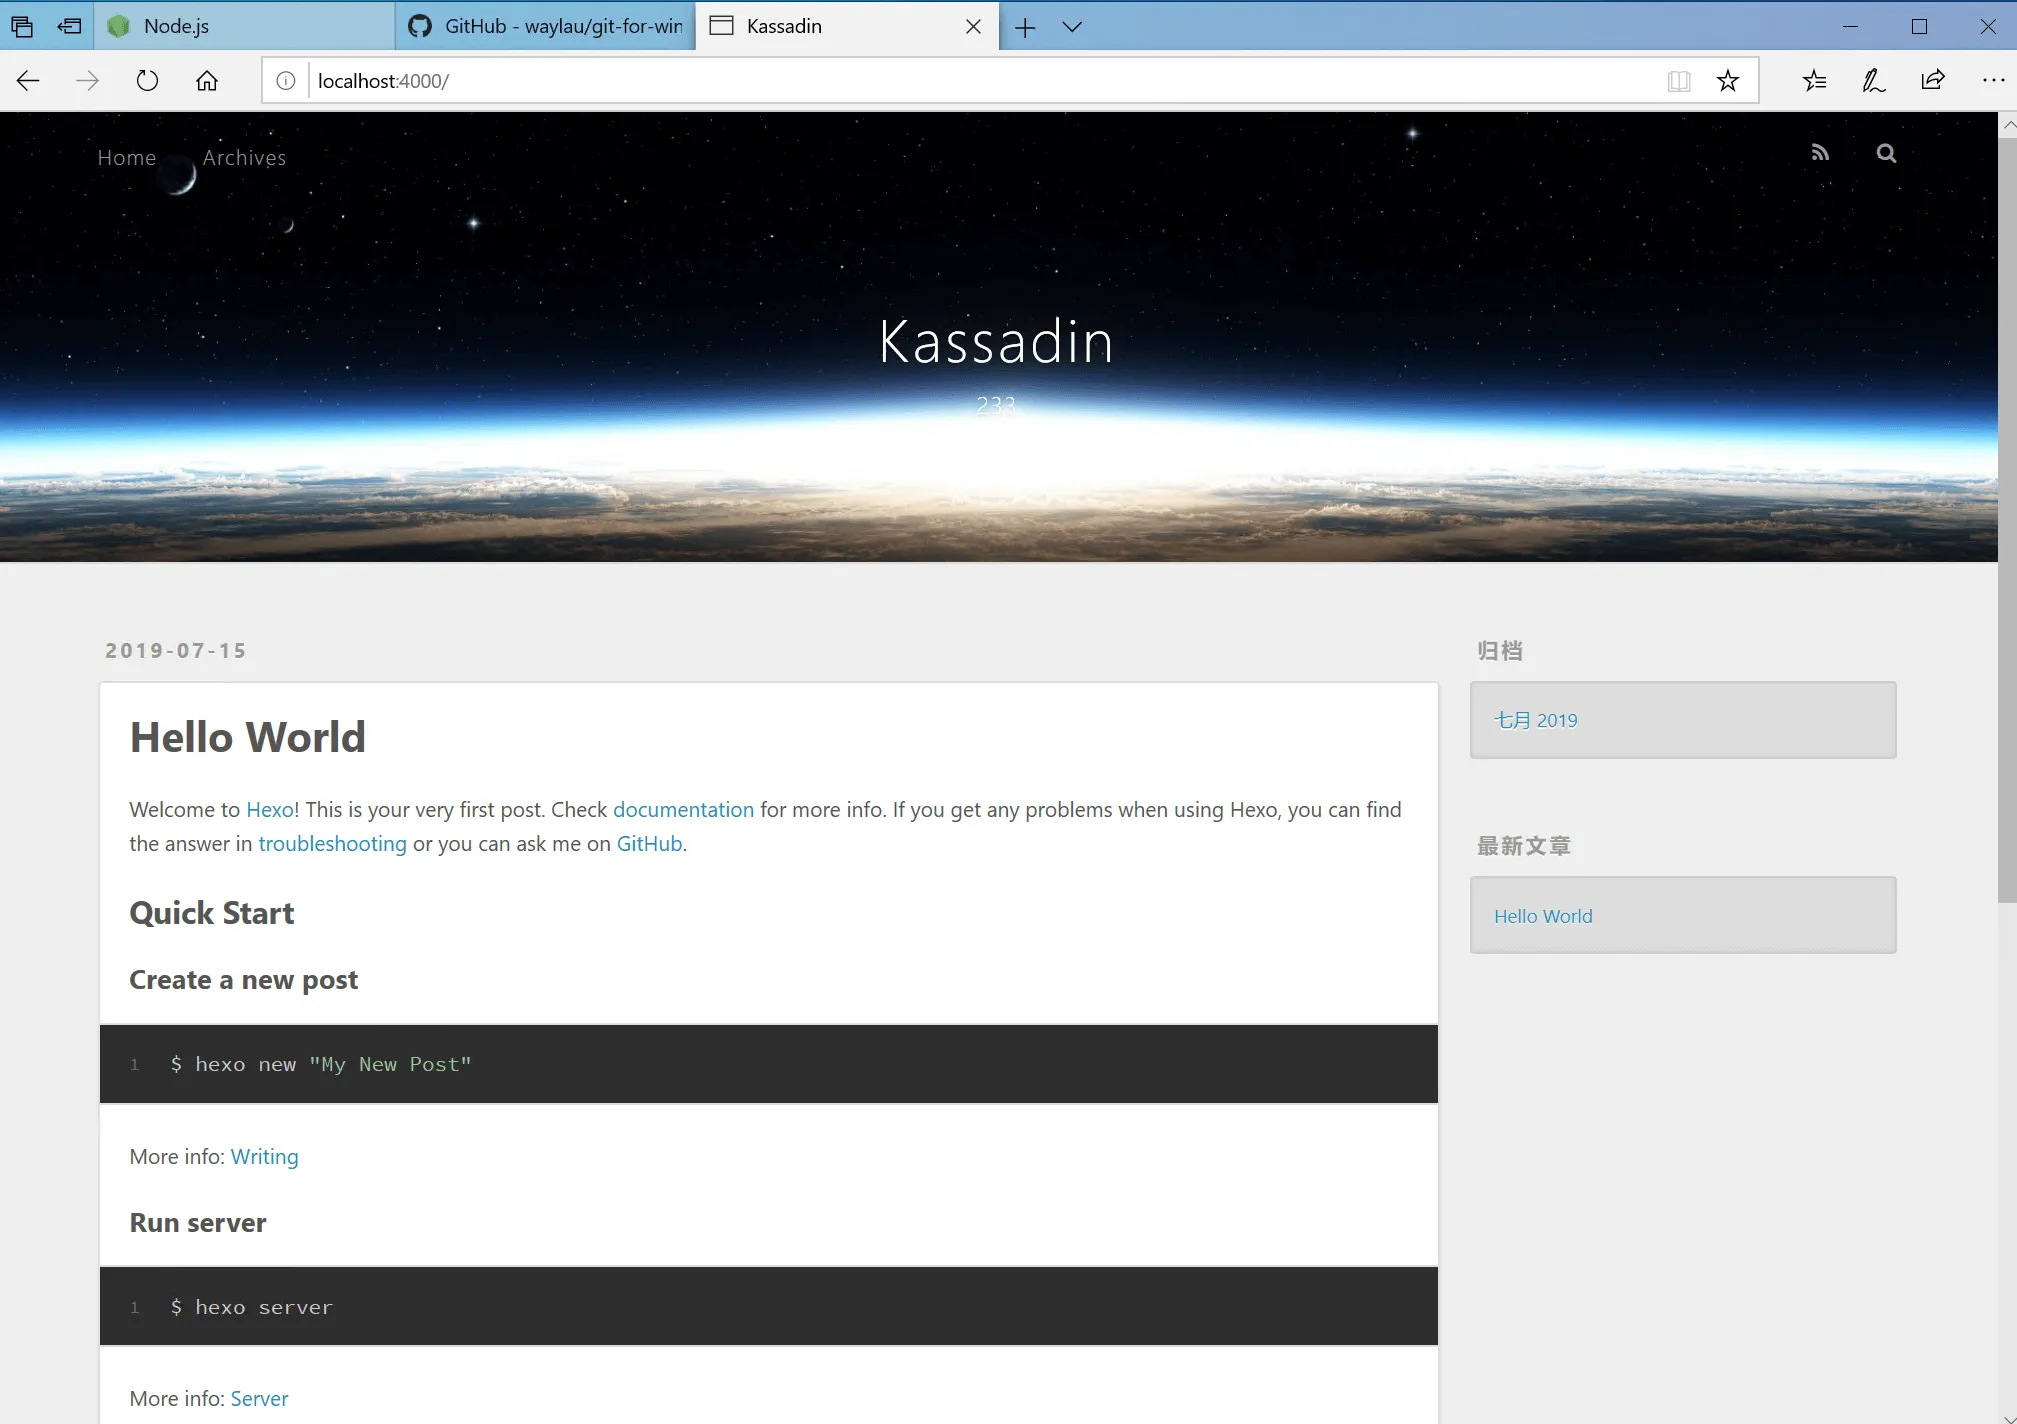
Hexo is running at http://localhost:4000
See It Working
- Open a browser and type
localhost:4000in the address bar.
You can also click: localhost:4000 - And then, wow:
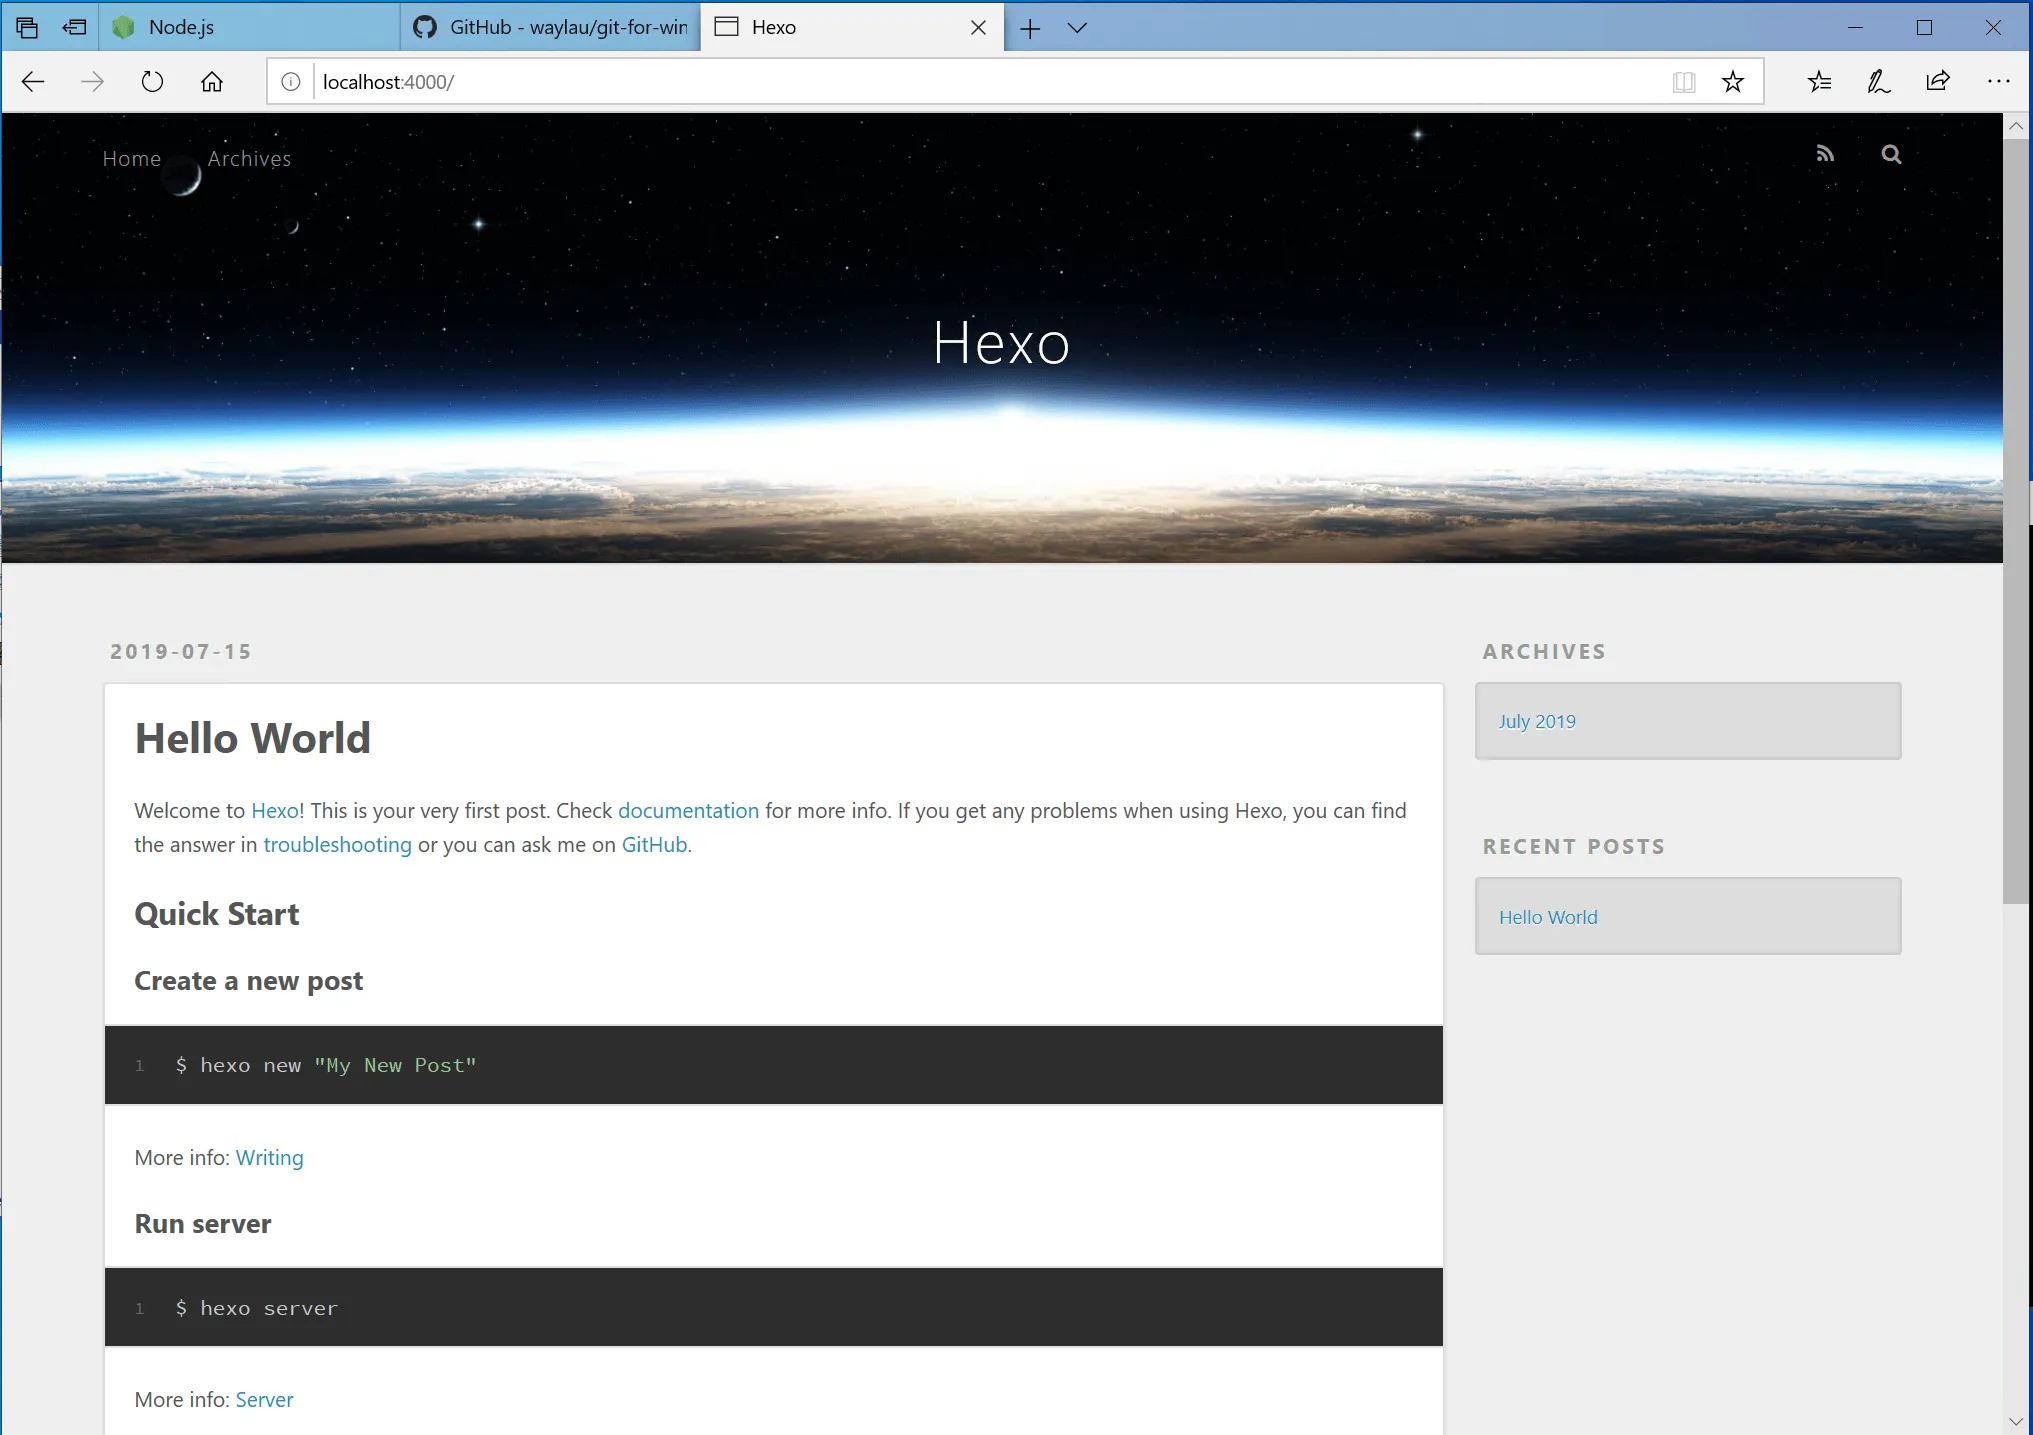
- Hexo has already created your first post for you:
Hello World
hexo sserves your site locally atlocalhost:4000. This is for debugging: check layout and content. If something is wrong, edit the post files, save, and refresh the page.
At this point, your blog is working locally.
But if you want to put it online so others can read it, you need to upload the generated files to GitHub.
So let’s continue.
(Before continuing, it’s best to stop the running local server: press Ctrl+C in the Git Bash window.)
Host on GitHub
Create an Account and Repository
- First, sign up for a GitHub account: Sign up
- Then, create a new repository: New repository
- Important: the repository name must be
username.github.io.
For example, if your username isKassadinL, the repo must beKassadinL.github.io.
Case doesn’t matter: it will be treated as lowercase.
Create the repo.

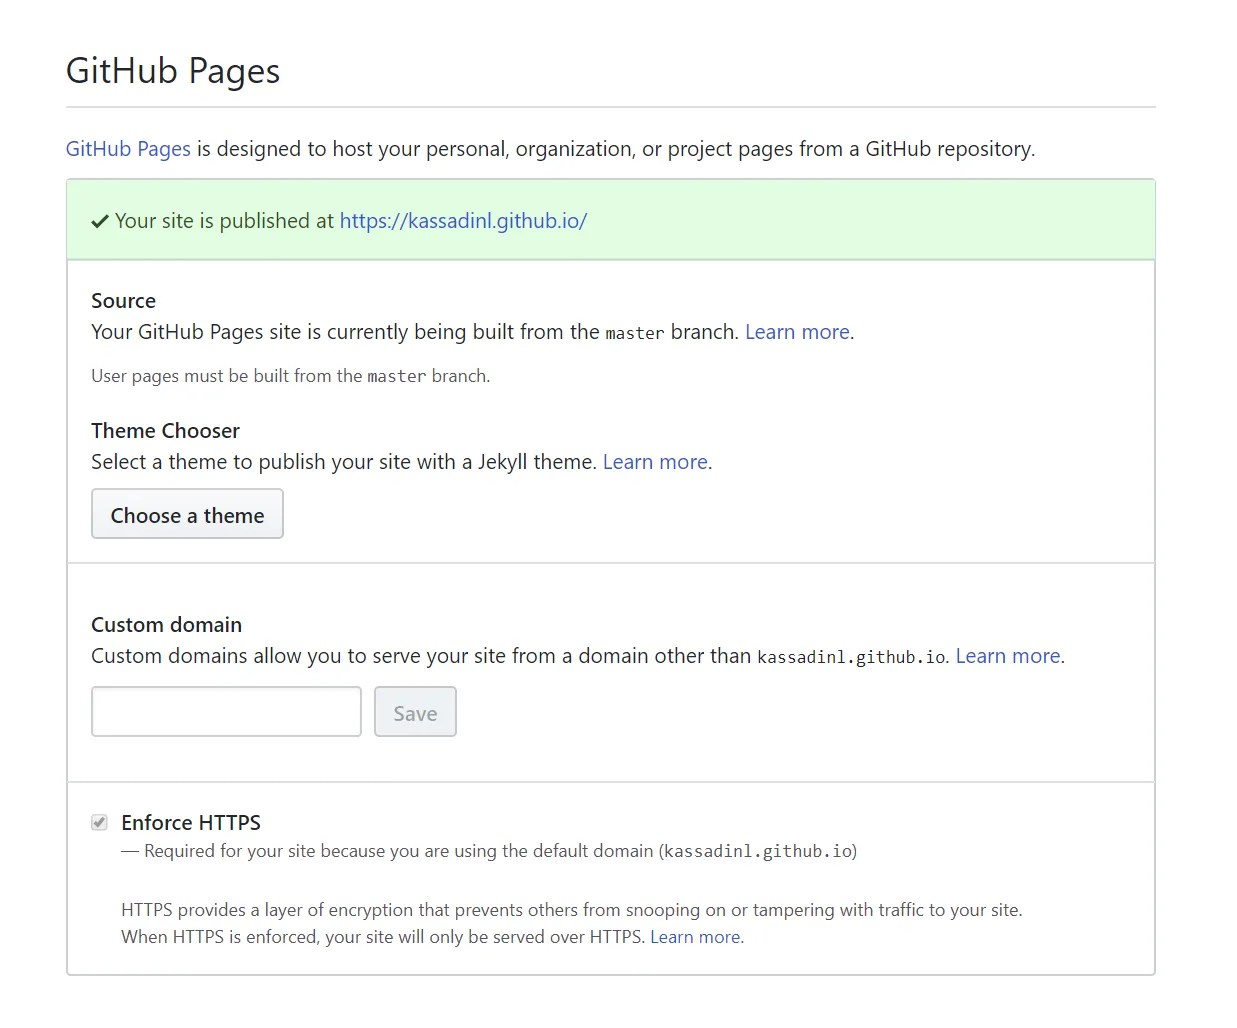
- Open your repo, find
Settingson the far right, and click it.
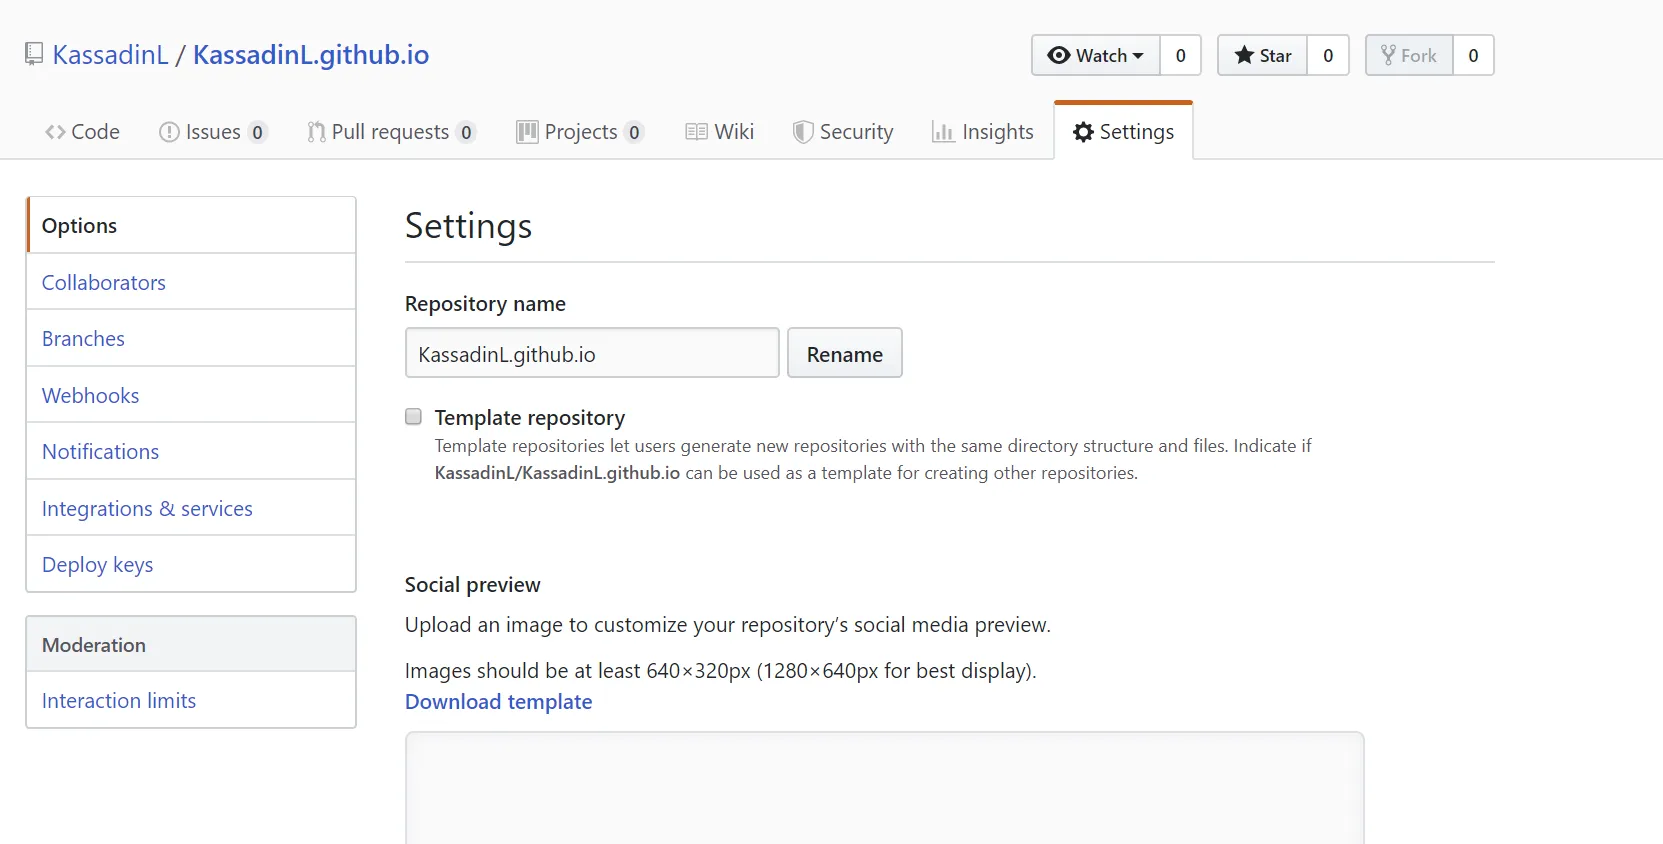
- Scroll down to
GitHub Pagesand enable it.
It should look like this.
(I’m not sure whether this is strictly required, but I don’t want to create another GitHub account to test, so you can try it.)
Connect Git and GitHub
To push local files to GitHub, Git needs to authenticate with GitHub, proving you’re the owner of the account.
To finish that, we’ll do a few steps.
- Open Git Bash, and set your GitHub username:
git config --global user.name "YourGitHubUsername"
For example, mine isKassadinL, so:
git config --global user.name "KassadinL" - Then set your GitHub email:
git config --global user.email "YourGitHubEmail"
For example:git config --global user.email "sensensensan@gmail.com"
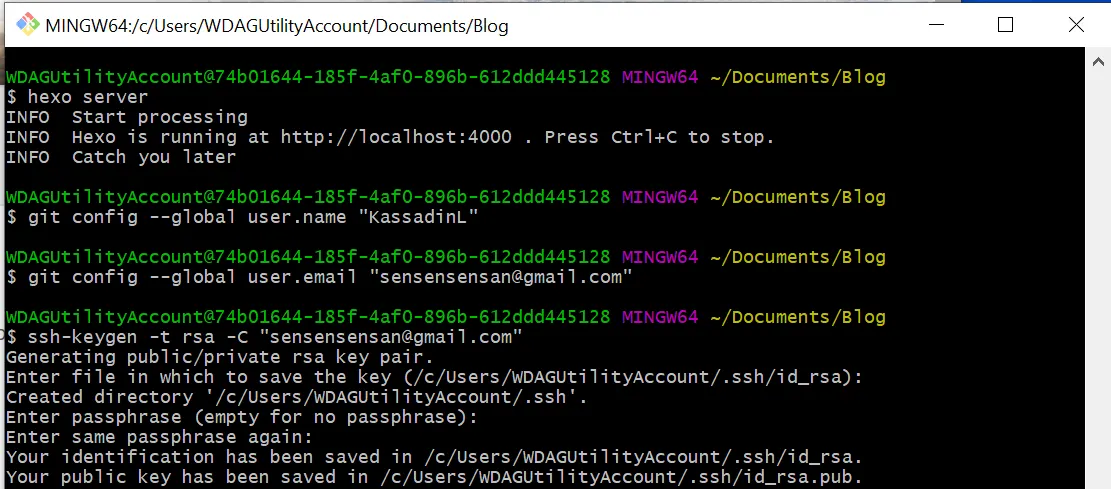
- These two steps store your account info in Git. Next we generate an SSH key.
- Type:
ssh-keygen -t rsa -C "YourGitHubEmail"
For example:ssh-keygen -t rsa -C "sensensensan@gmail.com"
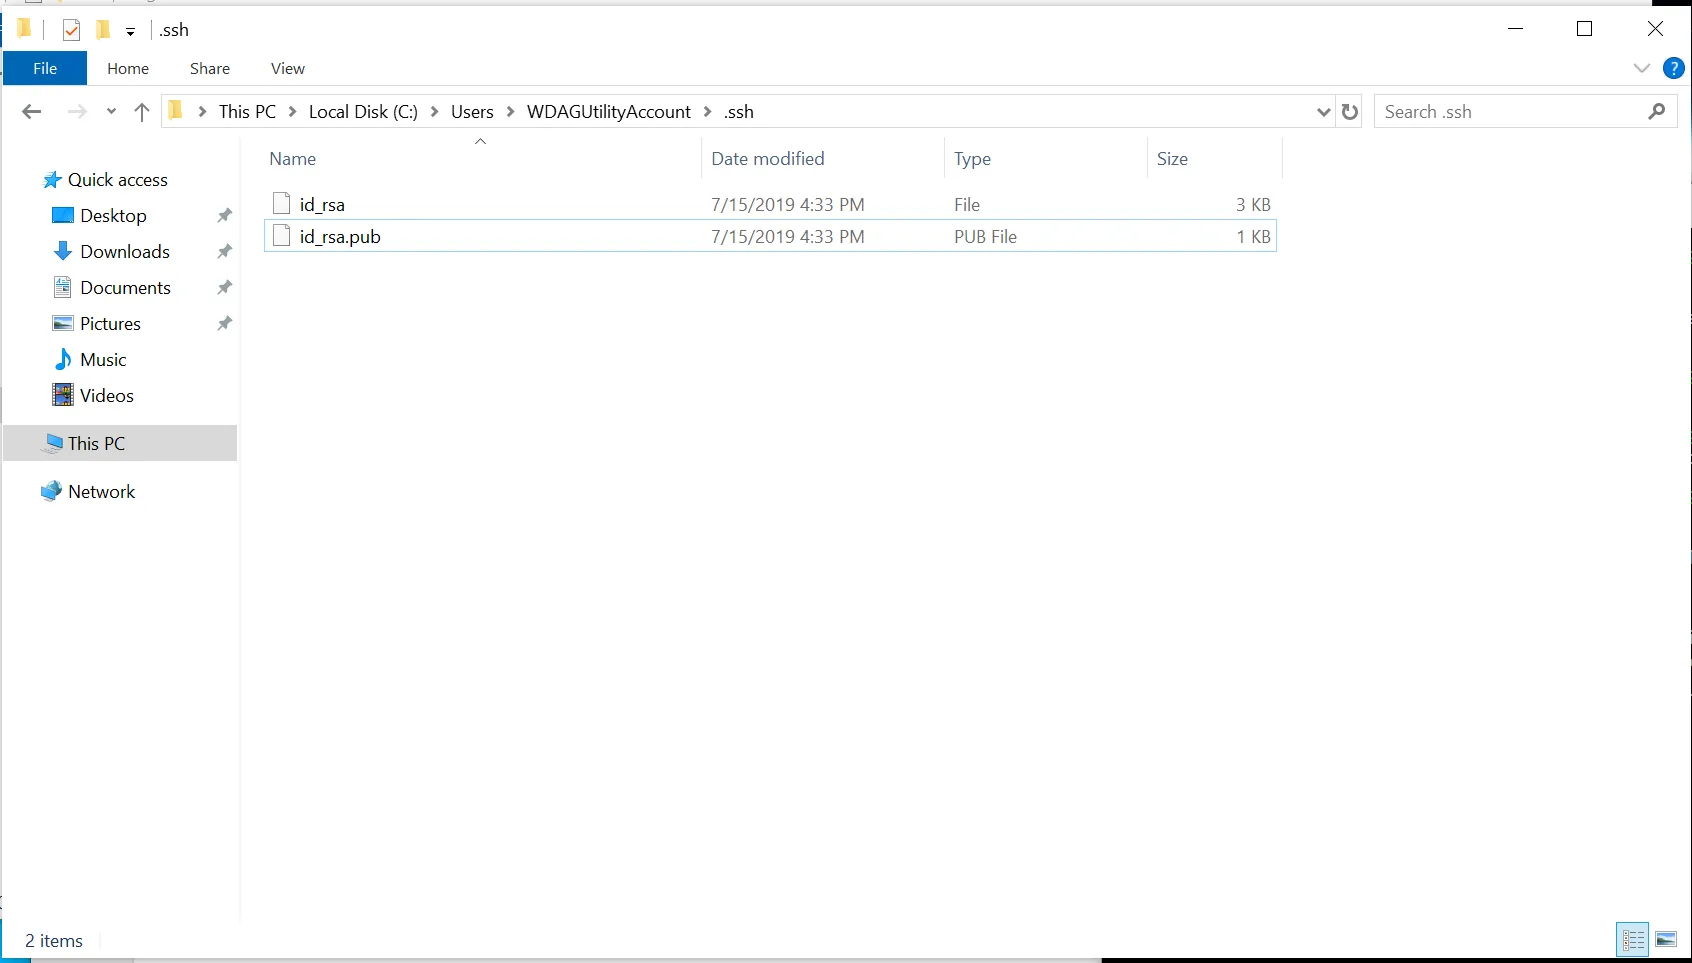
Press Enter, then press Enter three more times. - It will tell you where the key files are saved.
OpenC:->Users-><your username>->.ssh, findid_rsa.pub, open it with Notepad, and copy all content.
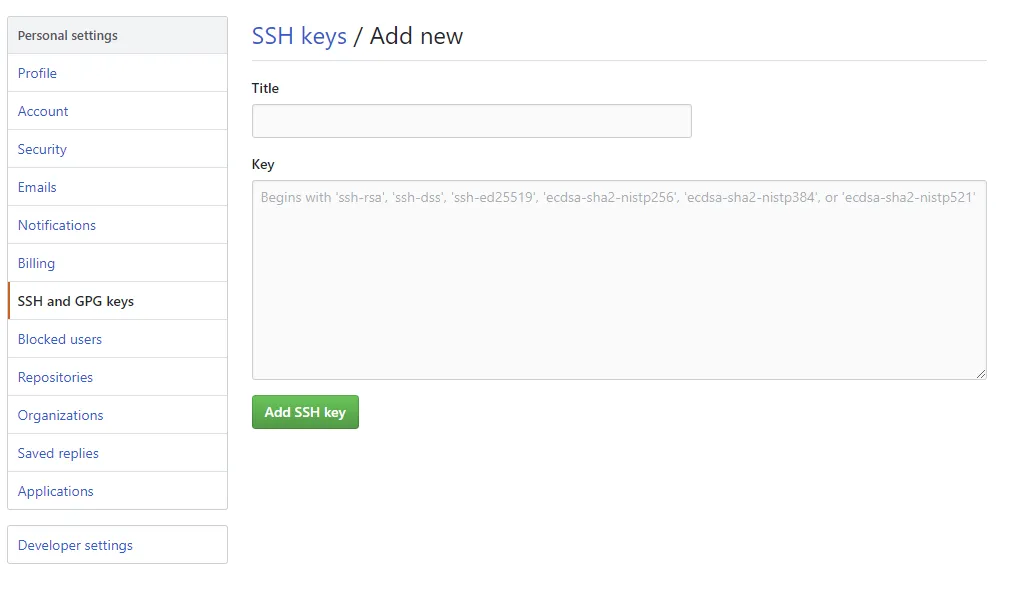
- Open GitHub Settings: SSH keys
ClickNew SSH key.
FillTitlewith anything (e.g.Blog), paste what you copied into theKeybox, then clickAdd SSH key.
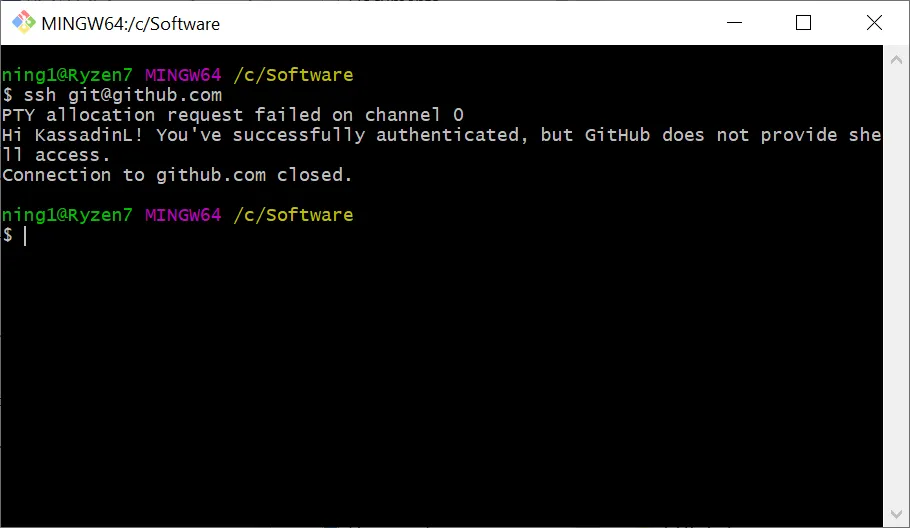
- Back to Git Bash, test whether the key works:
ssh git@github.com
Wait a moment. If it looks like the screenshot, it’s set up.
Push the Local Site to GitHub
- To deploy to GitHub, Hexo first needs to know where it is supposed to push the generated files.
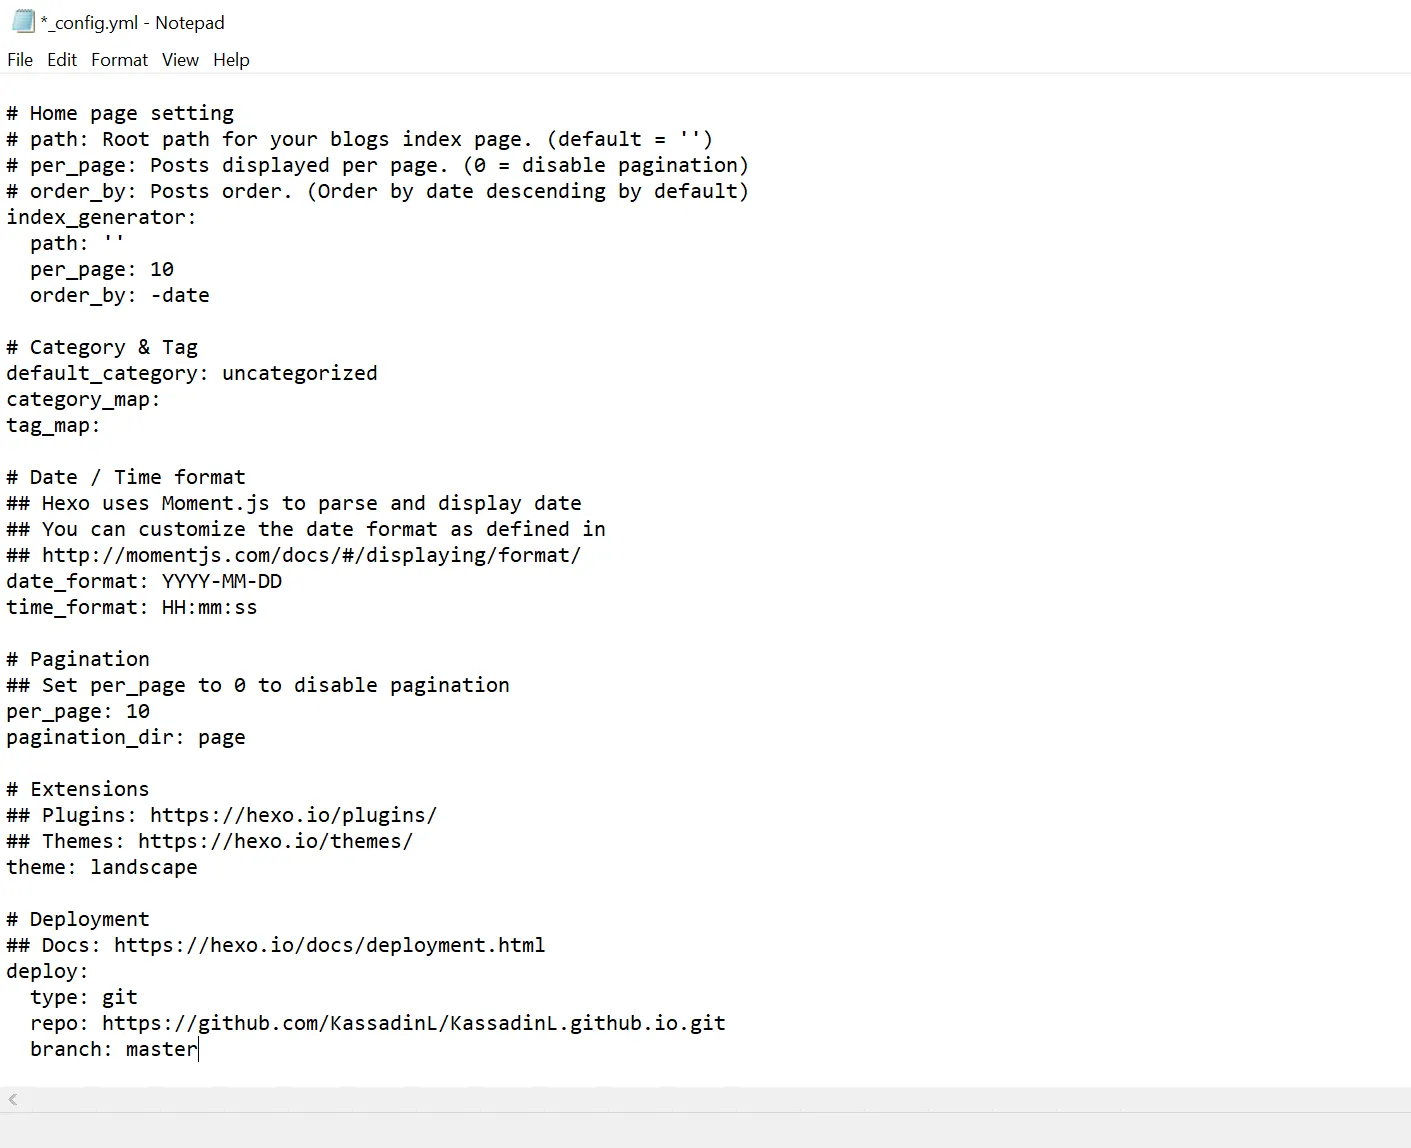
Open your localBlogfolder and find_config.yml(the site config file).
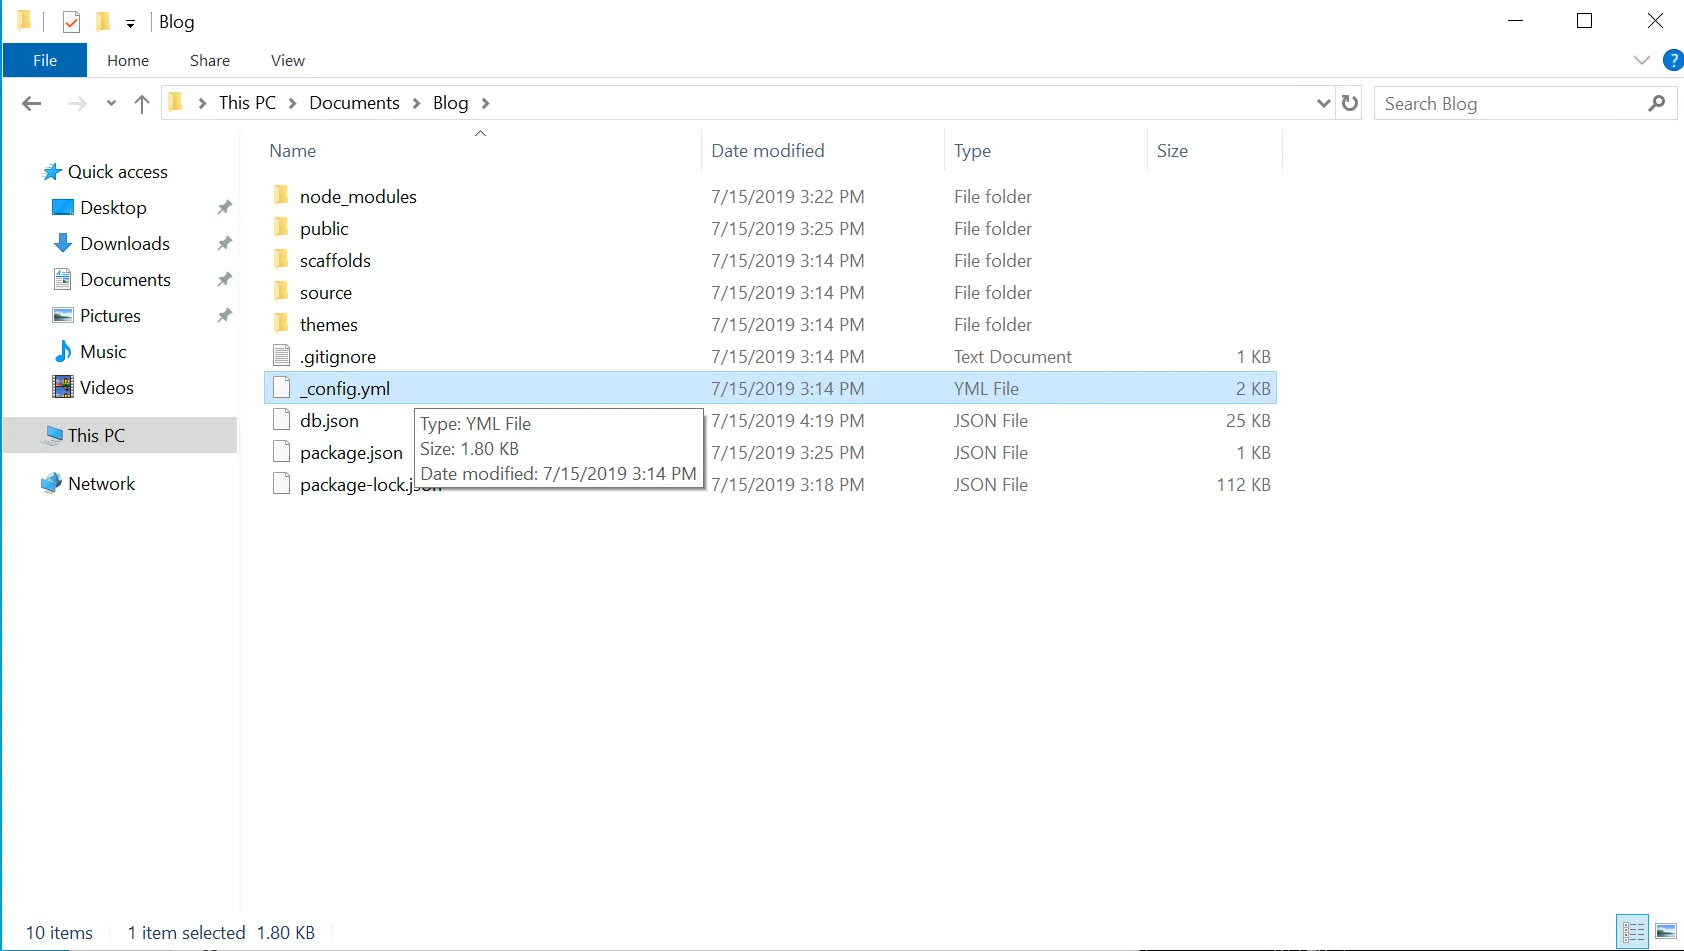
- Open it with Notepad, and edit the end of the file:
deploy: type: git repo: Fill in the full repository URL you created on GitHub, and remember to add .git branch: master-
Example change:
-
Notes:
- Remember to add
.gitto the URL. - You must put a space after
:. For example:type:gitis wrong,type: gitis correct.
- Remember to add
-
Save and close.
-
Install the git deploy plugin (Hexo uses it to push files):
npm install hexo-deployer-git --saveAt that point, your blog is ready to be published.
Quoting 吴润 - GitHub+Hexo 搭建个人网站详细教程 on why we use SSH to connect Git and GitHub:
“The reason to set up GitHub keys is to use public/private key cryptography. You put the public key on GitHub and keep the private key on your computer. GitHub requires authentication for each push, so normally you’d need to enter username/password every time. To avoid that, we use SSH: when you push, Git matches your private key against the public key on GitHub; if they match, you’re considered a valid user and the push is allowed.”
Common Commands
When working with Hexo, these are the commands you will use the most:
hexo sctrl chexo cleanhexo ghexo dExplanation:
hexo s(hexo server): serve locally. View the site at localhost:4000 to check layout and content. If something is wrong, edit the source files, save, and refresh.Ctrl C: stop the local server.hexo clean: remove generated files.hexo g(hexo generate): generate static files underBlog\public.hexo d(hexo deploy): deploy to GitHub.
2020/05/04 update
hexo cleancan be shortened tohexo cl
hexo gandhexo dcan be combined ashexo g -d
Usage
Customize the Blog
- Change settings like title/subtitle/language.
- Open
_config.ymlin your local blog folder, and edit title, subtitle, language, timezone, etc.
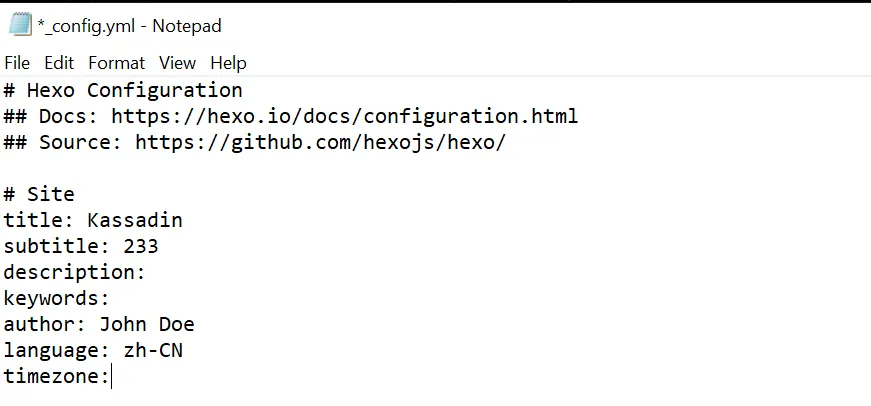
- For example, changing
title,subtitle,languageupdates the blog’s appearance.
- For more settings, see other tutorials.
- Open
Write Posts
- Use
hexo n(hexo new) to create a new post file underBlog\source\_posts\.
Open the file and start writing. - In that folder, you’ll see
hello-world.mdcreated by Hexo (your first post). - Usage: in Git Bash, run
hexo n name.nameis the filename. If it contains spaces, wrap it in double quotes. - Example:
hexo n "the First Blog"createsthe-First-Blog.mdunderBlog\source\_posts\. - Open the file and write.
- Hexo uses Markdown by default. Markdown is a plain-text format with simple rules for formatting.
See: Hexo Markdown 简明语法手册
The Correct Workflow
So, to summarize, this is the usual workflow for writing and publishing a post:
hexo n "the First Blog": create a post- Edit content with a Markdown editor (or any editor; I use Notepad++)
hexo s: serve locally to preview- If it looks good, press
Ctrl Cto stop the server hexo clean: clean old generated fileshexo g: generate new fileshexo d: deploy to GitHub- Done
2020/05/04 update
hexo clcleans old files
hexo g -dgenerates and deploys in one go
Celebrate
At this point, your blog is fully built.
You can open username.github.io in the browser.
For example, my blog is kassadinl.github.io.
Try opening it on your phone or another computer too.
It feels a little magical the first time it works.
That’s the end of the main tutorial.
The End. Celebration. Celebration.
Appendix
- About custom domains:
Many tutorials also explain how to bind a custom domain. I did not need that at the time, so I never dug into it properly. If you do want to set one up, the tutorial below is a good place to start:
吴润:GitHub+Hexo 搭建个人网站详细教程 - A few Git Bash basics:
In Git Bash,Ctrl CandCtrl Vdo not work the way they do in ordinary Windows apps.Ctrl Csends the stop signal instead.
UseCtrl Shift Cto copy, andShift Insertto paste.
The left and right arrow keys move the cursor. The up and down arrow keys cycle through command history. - Beginner traps I personally hit:
When creating the GitHub repository, the name really does have to beusername.github.io. At first I wanted a prettier custom name, likeMoriBlog.github.io, and lost a lot of time there. In hindsight the rule is perfectly logical: the site domain isusername.github.io, and usernames have to be unique.
Use Git Bash rather than Windows CMD or PowerShell. The other two sometimes fail to recognize the commands used in these tutorials.
After previewing withhexo s, stop it promptly withCtrl C. I once had several Git Bash windows open, forgot one was still serving the site, and then spent ages wondering why later theme changes were not taking effect.
For the language setting,language: zh-CNworked better for me than thelanguage: zh-Hansvalue shown in the official docs. Maybe the docs were outdated; somehow the official value turned my blog language into German. - About themes:
Hexo is open source, so if you are unhappy with the look of the blog, you can change almost anything.
Themes are basically just a matter of editing config files and swapping templates.
See: wangwlj—Hexo搭建的GitHub博客之优化大全
References
I mainly referenced these when building the blog:
- 吴润:GitHub+Hexo 搭建个人网站详细教程
- Hexo官方文档 (Hexo was written by a Taiwanese author and has great Chinese support.)
- 思武:十分钟建好托管在GitHub上的个人网站
- 无小意丶:免费快速搭建博客教程,Hexo&GitHub
- wangwlj:Hexo搭建的GitHub博客之优化大全
Final Notes
Building this blog may have started as a burst of “three-minute enthusiasm,” but the idea had been sitting in my head for a long time, so it still felt like finally fulfilling a small wish.
There were still plenty of things I was not happy with, such as my unfamiliarity with Markdown, awkward formatting, and the fact that I had not yet customized the theme very much.
Besides satisfying my urge to tinker, I also wanted this blog to become a place where I could record what I was doing.
At the time I was learning Blender, so I thought future posts might end up being Blender tutorials, Blender works, or something along those lines. If any ever got written.
2019/07/15 AY
Updates
2019/07/17 Update
While reorganizing posts, such as renaming files or folders, I found that the images attached to a post could disappear.
It happened twice, though thankfully I was able to restore them from the Recycle Bin.
My current guess is that I forgot to stop hexo s before doing those operations.
(I have stepped on this trap more than once.)
2019/07/25 Update
Added the “CC 4.0” license.
Referenced:
潘高—Hexo博客NexT主题美化之自定义文章底部版权声明
For a brief intro to Creative Commons:
漠伦—“知识共享”(CC协议)简单介绍
(I actually wanted to use CC BY-NC-SA, but most blogs I saw used CC BY-NC-ND, and many were version 3.0.
So I’m using this for now.)
2019/08/18 Update
Adjust image size.
The NexT theme stretches images to full width by default, which is not always pleasant to read.
After some searching, I found that you can wrap an image in a div to control its scale.
Insert <div style="width: 70%; margin: auto"> and </div> around the image.
width: can be pixels like 200px, or percentages like 70%.
2019/09/19 Update
Fixed a wrong copyright link.
Today I noticed the final copyright link was wrong: it showed http://yoursite.com/* instead of my site URL.
It didn’t seem to be a problem before.
I searched online and found the fix:
Moorez - hexo的next主题个性化配置教程
2019/09/25 Update
Embed Bilibili videos.
Bilibili’s default embed is bad: it only plays 360p, the embedded player is tiny, and the experience is terrible.
You can only adjust width/height with iframe, but there are many limitations.
<iframe src="//player.bilibili.com/player.html?aid=8854302&cid=19328137&page=1" scrolling="no" border="0" frameborder="no" framespacing="0" allowfullscreen="true"></iframe><iframe src="//player.bilibili.com/player.html?aid=8854302&cid=19328137&page=1" width="100%" height="600" scrolling="no" border="0" frameborder="no" framespacing="0" allowfullscreen="true"></iframe><iframe id="spkj" src="//player.bilibili.com/player.html?aid=8854302&cid=19328137&page=1" scrolling="no" border="0" frameborder="no" framespacing="0" allowfullscreen="true" width="100%"></iframe><script type="text/javascript"> document.getElementById('spkj').style.height = document.getElementById('spkj').scrollWidth * 0.76 + 'px';</script>The first snippet is Bilibili’s generated embed.
The second snippet adds responsive width.
The third snippet adds a responsive height script.
References:
Internal post links.
Usage:
{% post_link 001-how-to-deploy-blog-with-hexo-and-github %}Reference:
Marshal@十万光年 - Hexo使用内链及文章中加入图片的方法
A brief Markdown syntax note.
I hit formatting issues while updating, searched, and learned on the fly.
Reference:
Hexo Markdown 简明语法手册
2019/09/26 Update
Add search.
Reference: hexo - Next 主题添加搜索功能
When installing the search module, I saw two errors saying dependency versions were too low, but search still worked.
2019/11/26 Update
I set up the blog once on Linux.
Re-reading this tutorial, I tweaked some wording.
Switched to the Fluid theme. It looks nice.
Reference: 使用指南 - Fluid
2019/11/29 Update
I tried to upgrade Hexo on Windows.
npm update seemed to do nothing.
Then I did something stupid: uninstalled Node.js (thinking reinstalling = latest).
Result: I got stuck at hexo init and npm install.
Git Bash output:
username@alias MINGW64 ~/Documents/Blog$ hexo initINFO Cloning hexo-starter https://github.com/hexojs/hexo-starter.gitCloning into 'C:\Users\username\Documents\Blog'...remote: Enumerating objects: 22, done.remote: Counting objects: 100% (22/22), done.remote: Compressing objects: 100% (18/18), done.remote: Total 153 (delta 8), reused 8 (delta 2), pack-reused 131Receiving objects: 100% (153/153), 29.67 KiB | 660.00 KiB/s, done.Resolving deltas: 100% (70/70), done.Submodule 'themes/landscape' (https://github.com/hexojs/hexo-theme-landscape.git) registered for path 'themes/landscape'Cloning into 'C:/Users/username/Documents/Blog/themes/landscape'...remote: Enumerating objects: 32, done.remote: Counting objects: 100% (32/32), done.remote: Compressing objects: 100% (25/25), done.remote: Total 1054 (delta 20), reused 13 (delta 7), pack-reused 1022Receiving objects: 100% (1054/1054), 3.21 MiB | 851.00 KiB/s, done.Resolving deltas: 100% (578/578), done.Submodule path 'themes/landscape': checked out '73a23c51f8487cfcd7c6deec96ccc7543960d350'INFO Install dependencies'npm' is not recognized as an internal or external command,operable program or batch file.WARN Failed to install dependencies. Please run 'npm install' manually!
username@alias MINGW64 ~/Documents/Blog$ npm install
> ejs@2.7.4 postinstall C:\Users\username\Documents\Blog\node_modules\ejs> node ./postinstall.js
'node' is not recognized as an internal or external command,operable program or batch file.npm WARN optional SKIPPING OPTIONAL DEPENDENCY: fsevents@1.2.9 (node_modules\nunjucks\node_modules\fsevents):npm WARN notsup SKIPPING OPTIONAL DEPENDENCY: Unsupported platform for fsevents@1.2.9: wanted {"os":"darwin","arch":"any"} (current: {"os":"win32","arch":"x64"})npm WARN optional SKIPPING OPTIONAL DEPENDENCY: fsevents@2.1.2 (node_modules\fsevents):npm WARN notsup SKIPPING OPTIONAL DEPENDENCY: Unsupported platform for fsevents@2.1.2: wanted {"os":"darwin","arch":"any"} (current: {"os":"win32","arch":"x64"})
npm ERR! code ELIFECYCLEnpm ERR! errno 1npm ERR! ejs@2.7.4 postinstall: `node ./postinstall.js`npm ERR! Exit status 1npm ERR!npm ERR! Failed at the ejs@2.7.4 postinstall script.npm ERR! This is probably not a problem with npm. There is likely additional logging output above.
npm ERR! A complete log of this run can be found in:npm ERR! C:\Users\username\AppData\Roaming\npm-cache\_logs\2019-11-29T03_31_36_888Z-debug.logI wasted two hours on this…
In the end, the fix was: run those two commands (hexo init and npm install) in Node.js’s built-in Node.js command prompt.
It was because environment variables weren’t set.
(Windows is hard to use I’m too noob.)
2019/12/23 Update
Bind a domain and enable HTTPS.
I thought I didn’t need this, but when I was tinkering with trojan I needed a domain, so I decided to bind the domain to the blog.
(I was too noob, so it was neither smooth nor convenient.)
I bought kassadin.moe.
My trojan tinkering log: Note: Deploying trojan (With Luck)
References:
Managing a custom domain for your GitHub Pages site - GitHub docs
GitHub Pages自定义域名开启HTTPS - Razeen
GitHub+Hexo 搭建个人网站详细教程 - 吴润
I ran into some issues (maybe because I’m too noob / early settings were wrong), for example:
-
In Cloudflare,
A type recordandCNAME type recordseemed to be mutually exclusive for pointing to GitHub Pages.- If I used
A type record, I got this error: invalid certificate. - I couldn’t figure it out, so I used
CNAME type record.
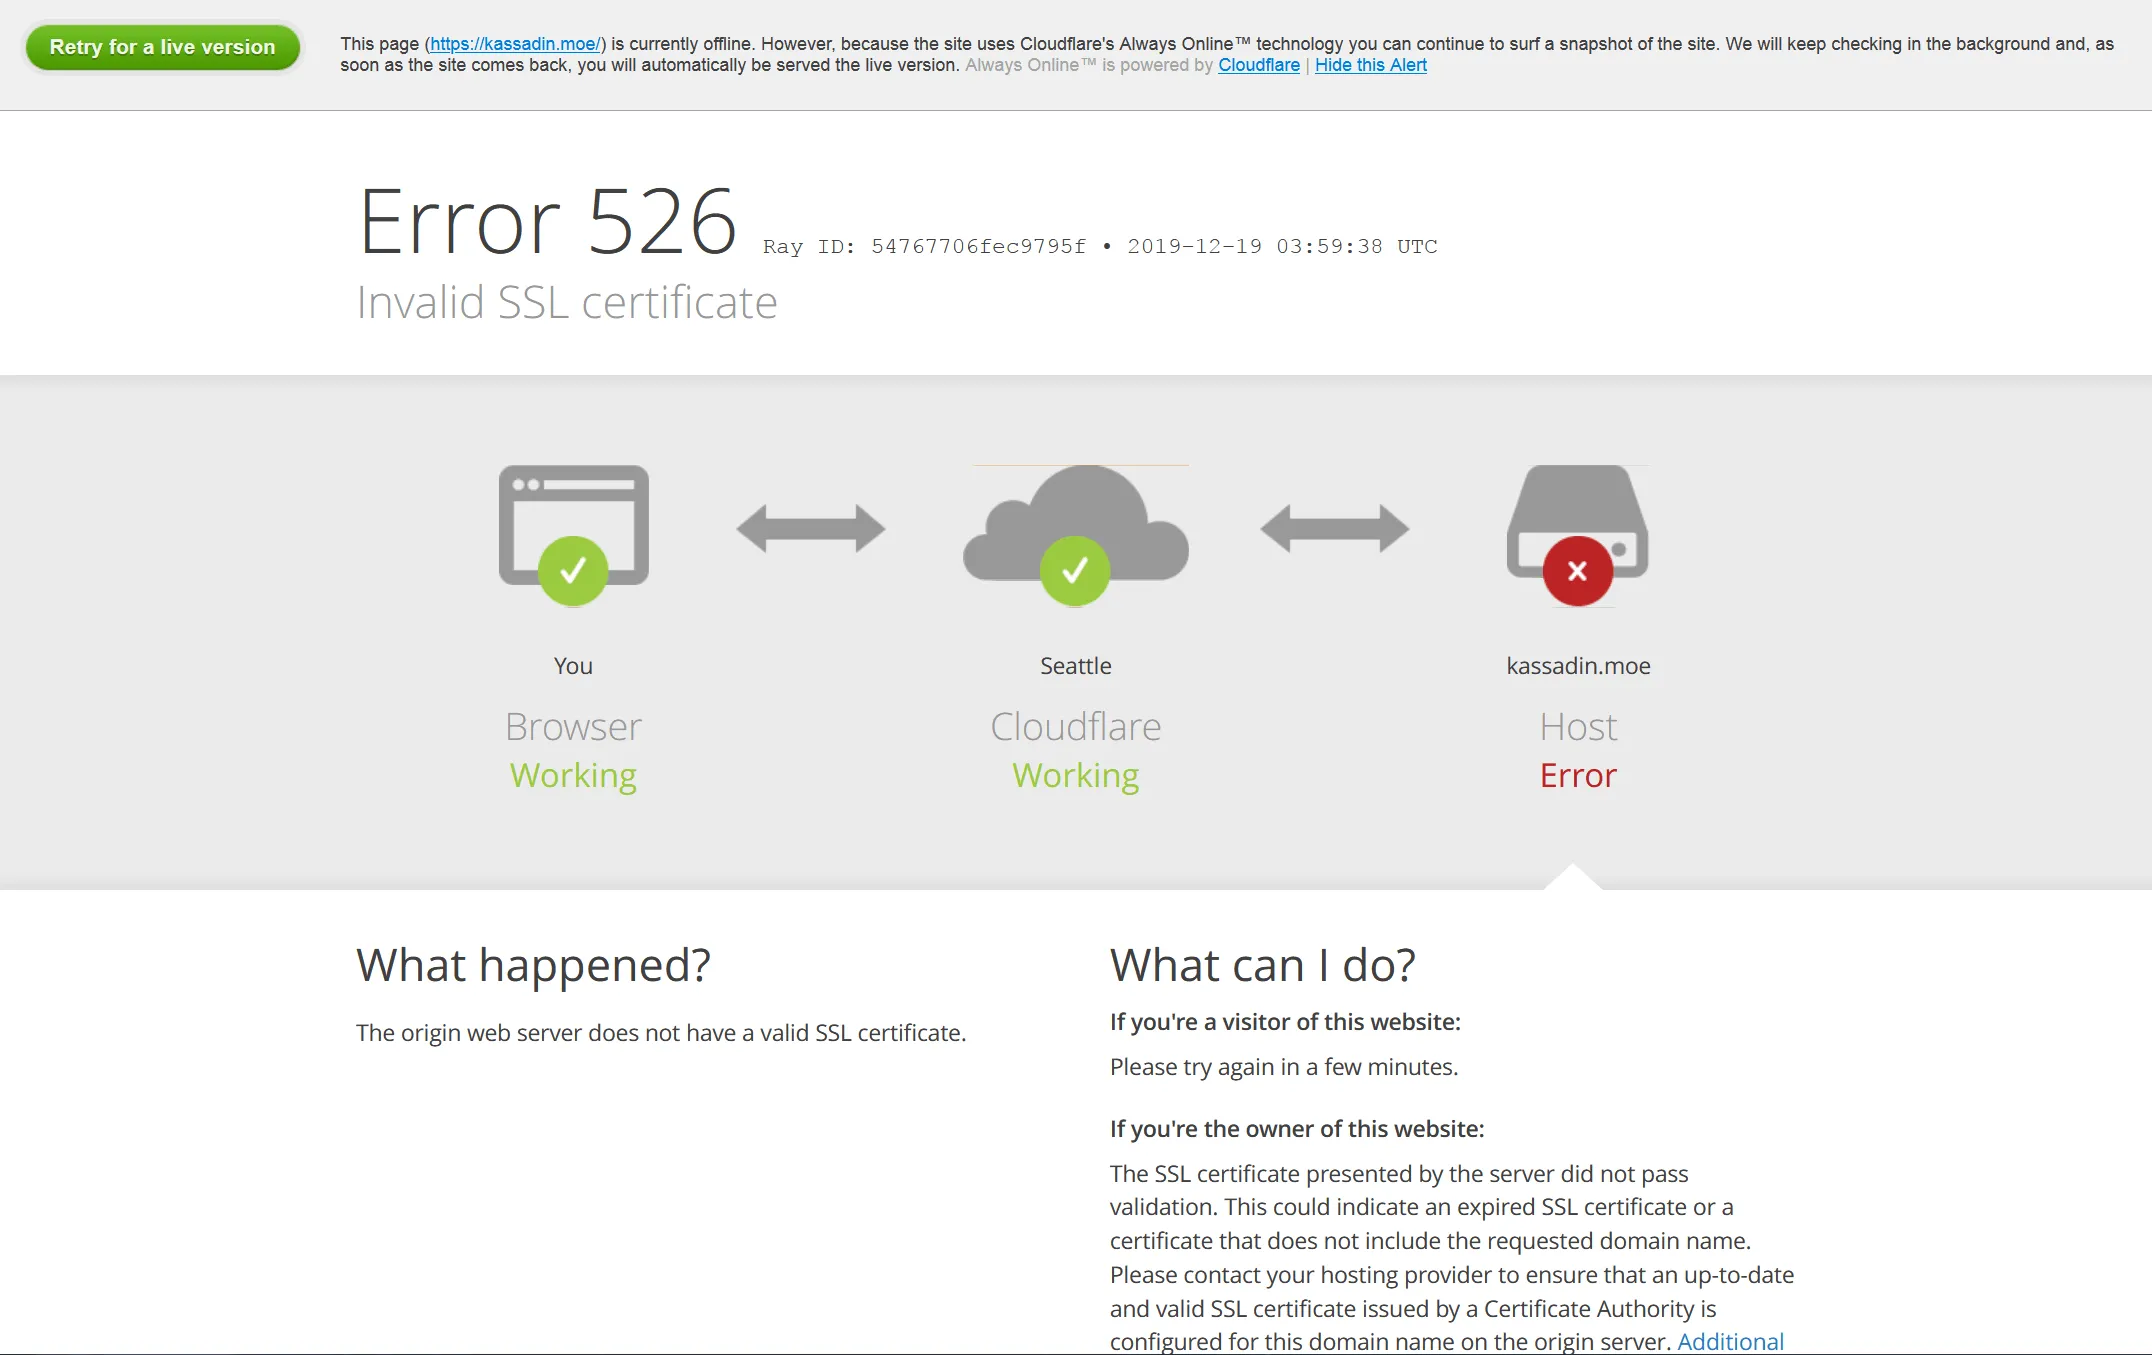
- If I used
-
In repo settings, under GitHub Pages, I couldn’t enable
Enforce HTTPS.
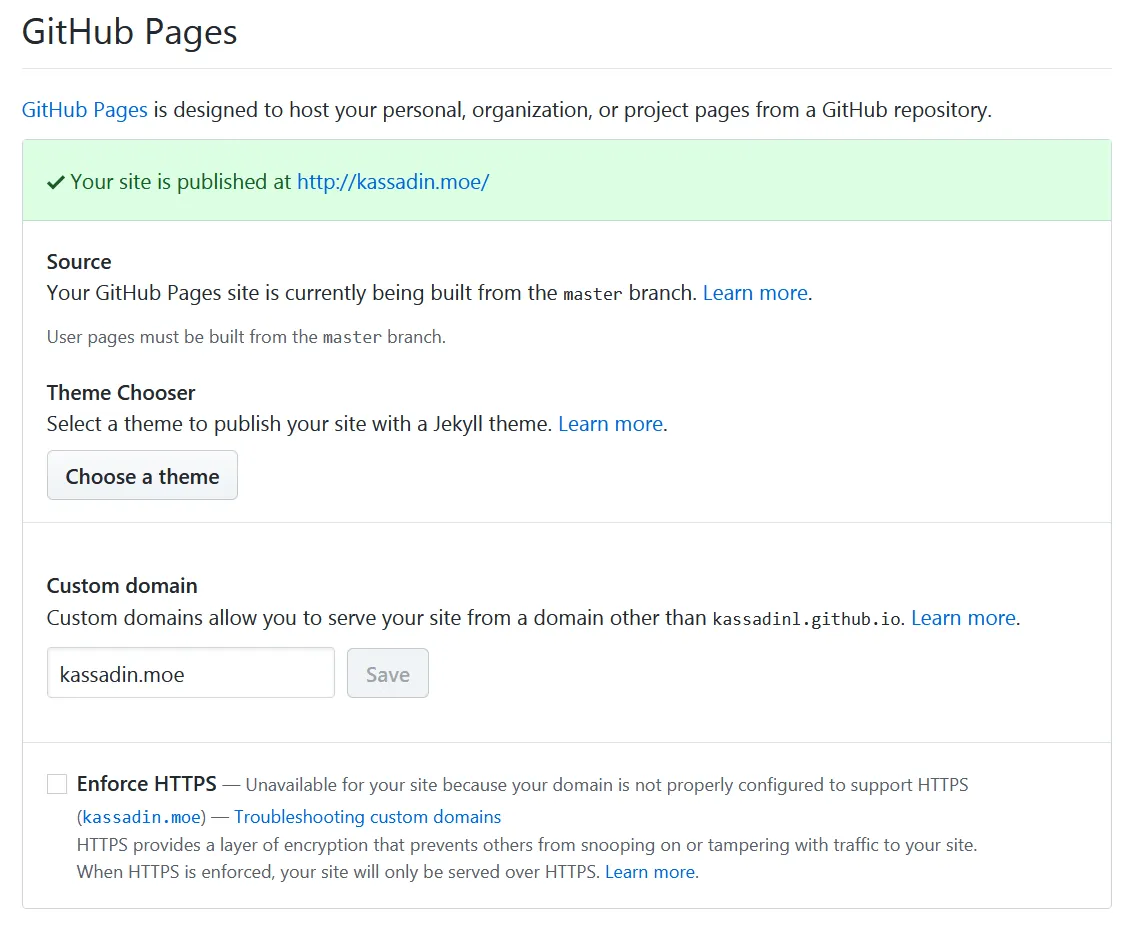
- I searched online. In this Zhihu thread about adding a free SSL certificate to a Hexo blog hosted on GitHub, some people said you need to wait 24 hours, but I waited 3 days and still couldn’t check
Enforce HTTPS. - I followed GitHub Pages自定义域名开启HTTPS, and also enabled everything that looked useful in Cloudflare, and finally HTTPS could be enforced.
- So I still don’t really know what made it work. It worked, so… fine.
- The official guide for managing a custom domain on GitHub Pages suggests using
digto verify DNS after configuration. No matter how I configured,dig kassadin.moelooked wrong… whatever. - My guess is: I initially used a subdomain
blog.kassadin.moeand configured it once, then later switched tokassadin.moe. And while troubleshootingEnforce HTTPS, I changed things frequently.
Maybe that caused it? Weird.
- I searched online. In this Zhihu thread about adding a free SSL certificate to a Hexo blog hosted on GitHub, some people said you need to wait 24 hours, but I waited 3 days and still couldn’t check
2019/12/28 update
The blog should be using Cloudflare’s certificate now.
2019/12/28 Update
Add a comment system.
I used the gitalk comment system supported by the Fluid theme.
References:
gitalk - GitHub
NexT主题中集成gitalk评论系统
自动初始化 Gitalk 和 Gitment 评论
After setup, you still need to click Initialize Issue under each post.
(There’s a script mentioned above, but I don’t know how to use it.)
2020/05/04 Update
Command shortcuts.
hexo cleancan be shortened tohexo clhexo gandhexo dcan be combined ashexo g -d
Add RSS.
Ref:
After enabling it, the RSS icon didn’t show up (maybe due to the Fluid theme).
I searched through the config and found that in the Navigation bar menu section, you just add an RSS entry:
# 导航栏菜单,可自行增减,key 用来关联 languages/*.yml,如不存在关联则显示 key 本身的值;icon 是 css class,可以省略;增加 name 可以强制显示指定名称 # Navigation bar menu. `key` is used to associate languages/*.yml. If there is no association, the value of `key` itself will be displayed; if `icon` is a css class, it can be omitted; adding `name` can force the display of the specified name menu: - { key: "home", link: "/", icon: "iconfont icon-home-fill" } - { key: "archive", link: "/archives/", icon: "iconfont icon-archive-fill" } - { key: "tag", link: "/tags/", icon: "iconfont icon-tags-fill" } - { key: "about", link: "/about/", icon: "iconfont icon-user-fill" } - { key: "rss", link: "/atom.xml", icon: "iconfont icon-rss", name: "RSS" }The last line is the RSS config.
2021/04/10 Update
Switched comment systems.
Recently I ran npm update and gitalk seemed to stop working, with Error: Request failed with status code 405.
I checked GitHub discussions: there were only a few posts about 405, while there were lots about 403.
It seemed related to a proxy parameter and looked complicated, so I gave up.
I switched to utterances, also supported by the Fluid theme. Like gitalk, it’s based on GitHub Issues.
Setup: utterances
It’s much simpler than gitalk, and also easier to use because you don’t need to Initialize Issue manually.
(But it seems there’s no anonymous commenting; you must use a GitHub account.)
2021/10/01 Update
SSH key errors.
When deploying (hexo d), I got various errors like:
git@ssh.github.com: Permission denied (publickey).
kex_exchange_identification: Connection closed by remote hostConnection closed by ...
git@ssh.github.com: Permission denied (publickey).fatal: Could not read from remote repository.At first I thought it was my proxy/VPN. Switching didn’t help.
I also tried various methods from
HEXO DEPLOY 时不断 Error: Permission denied (publickey). fatal: Could not read from remote repository. #1478
and
Win10使用ssh的hexo deploy到github報錯 #3339
Still didn’t work.
Then I saw this comment:
using cmd,type hexo d, Error: Permission denied (publickey). #2312
The ssh key doesn’t add to cmd environment.
Using ssh-add to add the key.
ssh-add ~/.ssh/id_rsa
Also GitHub docs:
Error: Permission denied (publickey) - Make sure you have a key that is being used
ssh-add -l returned The agent has no identities.
ssh-add returned Could not open a connection to your authentication agent.
Turns out my local environment wasn’t using any key at all…
Fix followed GitHub docs:
Generating a new SSH key and adding it to the ssh-agent
-
Start the ssh-agent in the background.
Terminal window $ eval "$(ssh-agent -s)"> Agent pid 59566Depending on your environment, you may need to use a different command. For example, you may need to use root access by running sudo -s -H before starting the ssh-agent, or you may need to use exec ssh-agent bash or exec ssh-agent zsh to run the ssh-agent.
-
Add your SSH private key to the ssh-agent. If you created your key with a different name, or if you are adding an existing key that has a different name, replace id_ed25519 in the command with the name of your private key file.
Terminal window ssh-add ~/.ssh/id_ed25519
Back then I saw this section but didn’t understand it, so I skipped it…
Now I wasted several hours.
2023/05/19 Update
SSH key error (2).
After a long time without updating the blog, today I wrote some notes and tried to deploy, and got this:
@@@@@@@@@@@@@@@@@@@@@@@@@@@@@@@@@@@@@@@@@@@@@@@@@@@@@@@@@@@@ WARNING: REMOTE HOST IDENTIFICATION HAS CHANGED! @@@@@@@@@@@@@@@@@@@@@@@@@@@@@@@@@@@@@@@@@@@@@@@@@@@@@@@@@@@@IT IS POSSIBLE THAT SOMEONE IS DOING SOMETHING NASTY!Someone could be eavesdropping on you right now (man-in-the-middle attack)!It is also possible that a host key has just been changed.The fingerprint for the RSA key sent by the remote host isSHA256:uNiVztksCsDhcc0u9e8BujQXVUpKZIDTMczCvj3tD2s.Please contact your system administrator.Add correct host key in /home/***/.ssh/known_hosts to get rid of this message.Offending RSA key in /home/***/.ssh/known_hosts:17Host key for [ssh.github.com]:443 has changed and you have requested strict checking.Host key verification failed....I searched online and found GitHub’s post:
We updated our RSA SSH host key
I followed the steps there, but it still failed.
Reading the error carefully:
Add correct host key in /home/***/.ssh/known_hosts to get rid of this message.Offending RSA key in /home/***/.ssh/known_hosts:17Seems like my GitHub key config was wrong.
In ~/.ssh/config, add:
Host github.comHostName github.comPreferredAuthentications publickeyIdentityFile ~/.ssh/YourPrivateKeyFileNameUser YournameThen it works.
I had actually configured it before, but I had two entries, and the first one was wrong.
SSH always used the first wrong entry, so it kept failing.
2023/05/19 Update 2
hexo d asks for username and password.
In the blog’s _config.yml, if the repo URL uses HTTPS, it will ask for username/password.
With a git (SSH) URL, it uses the key automatically.
So just switch back to the git URL.
Ref:
hexo d must enter pwd | hexo deploy的时候一直需要输入密码
2024/07/03 Update
I deployed to GitHub, but the blog didn’t update for a long time.
At one point I even thought Hexo was broken (time to migrate to Hugo).
On the blog repo page Settings -> Pages, it showed this error:
Actions is currently unavailable for your repository, and your Pages site requires a Jekyll build step.
To continue building your site on pushes, you need to enable Actions.
After messing around for a while, I realized GitHub changed Pages deployment to use GitHub Actions.
Fix:
Blog repo Settings -> Actions -> General
At the top, under Actions permissions, choose the 4th option Allow ... actions and reusable workflows, then check the first box Allow actions created by GitHub.
Save.
Then hexo deploy works again.
On the repo commit history, when the blog updates, after XXX committed xx minutes ago it shows a 3/3 check.
Before, it was 2/2.
(Deploy failures have no check mark.)
After I fixed it, I went back to GitHub docs and realized they had mentioned it:
In Troubleshooting Jekyll build errors for GitHub Pages sites, in the Who can use this feature? box, second paragraph:
All GitHub Pages builds will use GitHub Actions from June 30, 2024.
No other changes are required but GitHub Actions must be enabled in your repository for builds to continue.
For more information on enabling GitHub Actions, see “Managing GitHub Actions settings for a repository.”
They switched on June 30, and it had only been a few days. It really got me…
Also, putting this info inside the
Who can use this feature?box feels odd.
The last few times I opened the doc I only skimmed the beginning, so I missed the second paragraph.
Comments