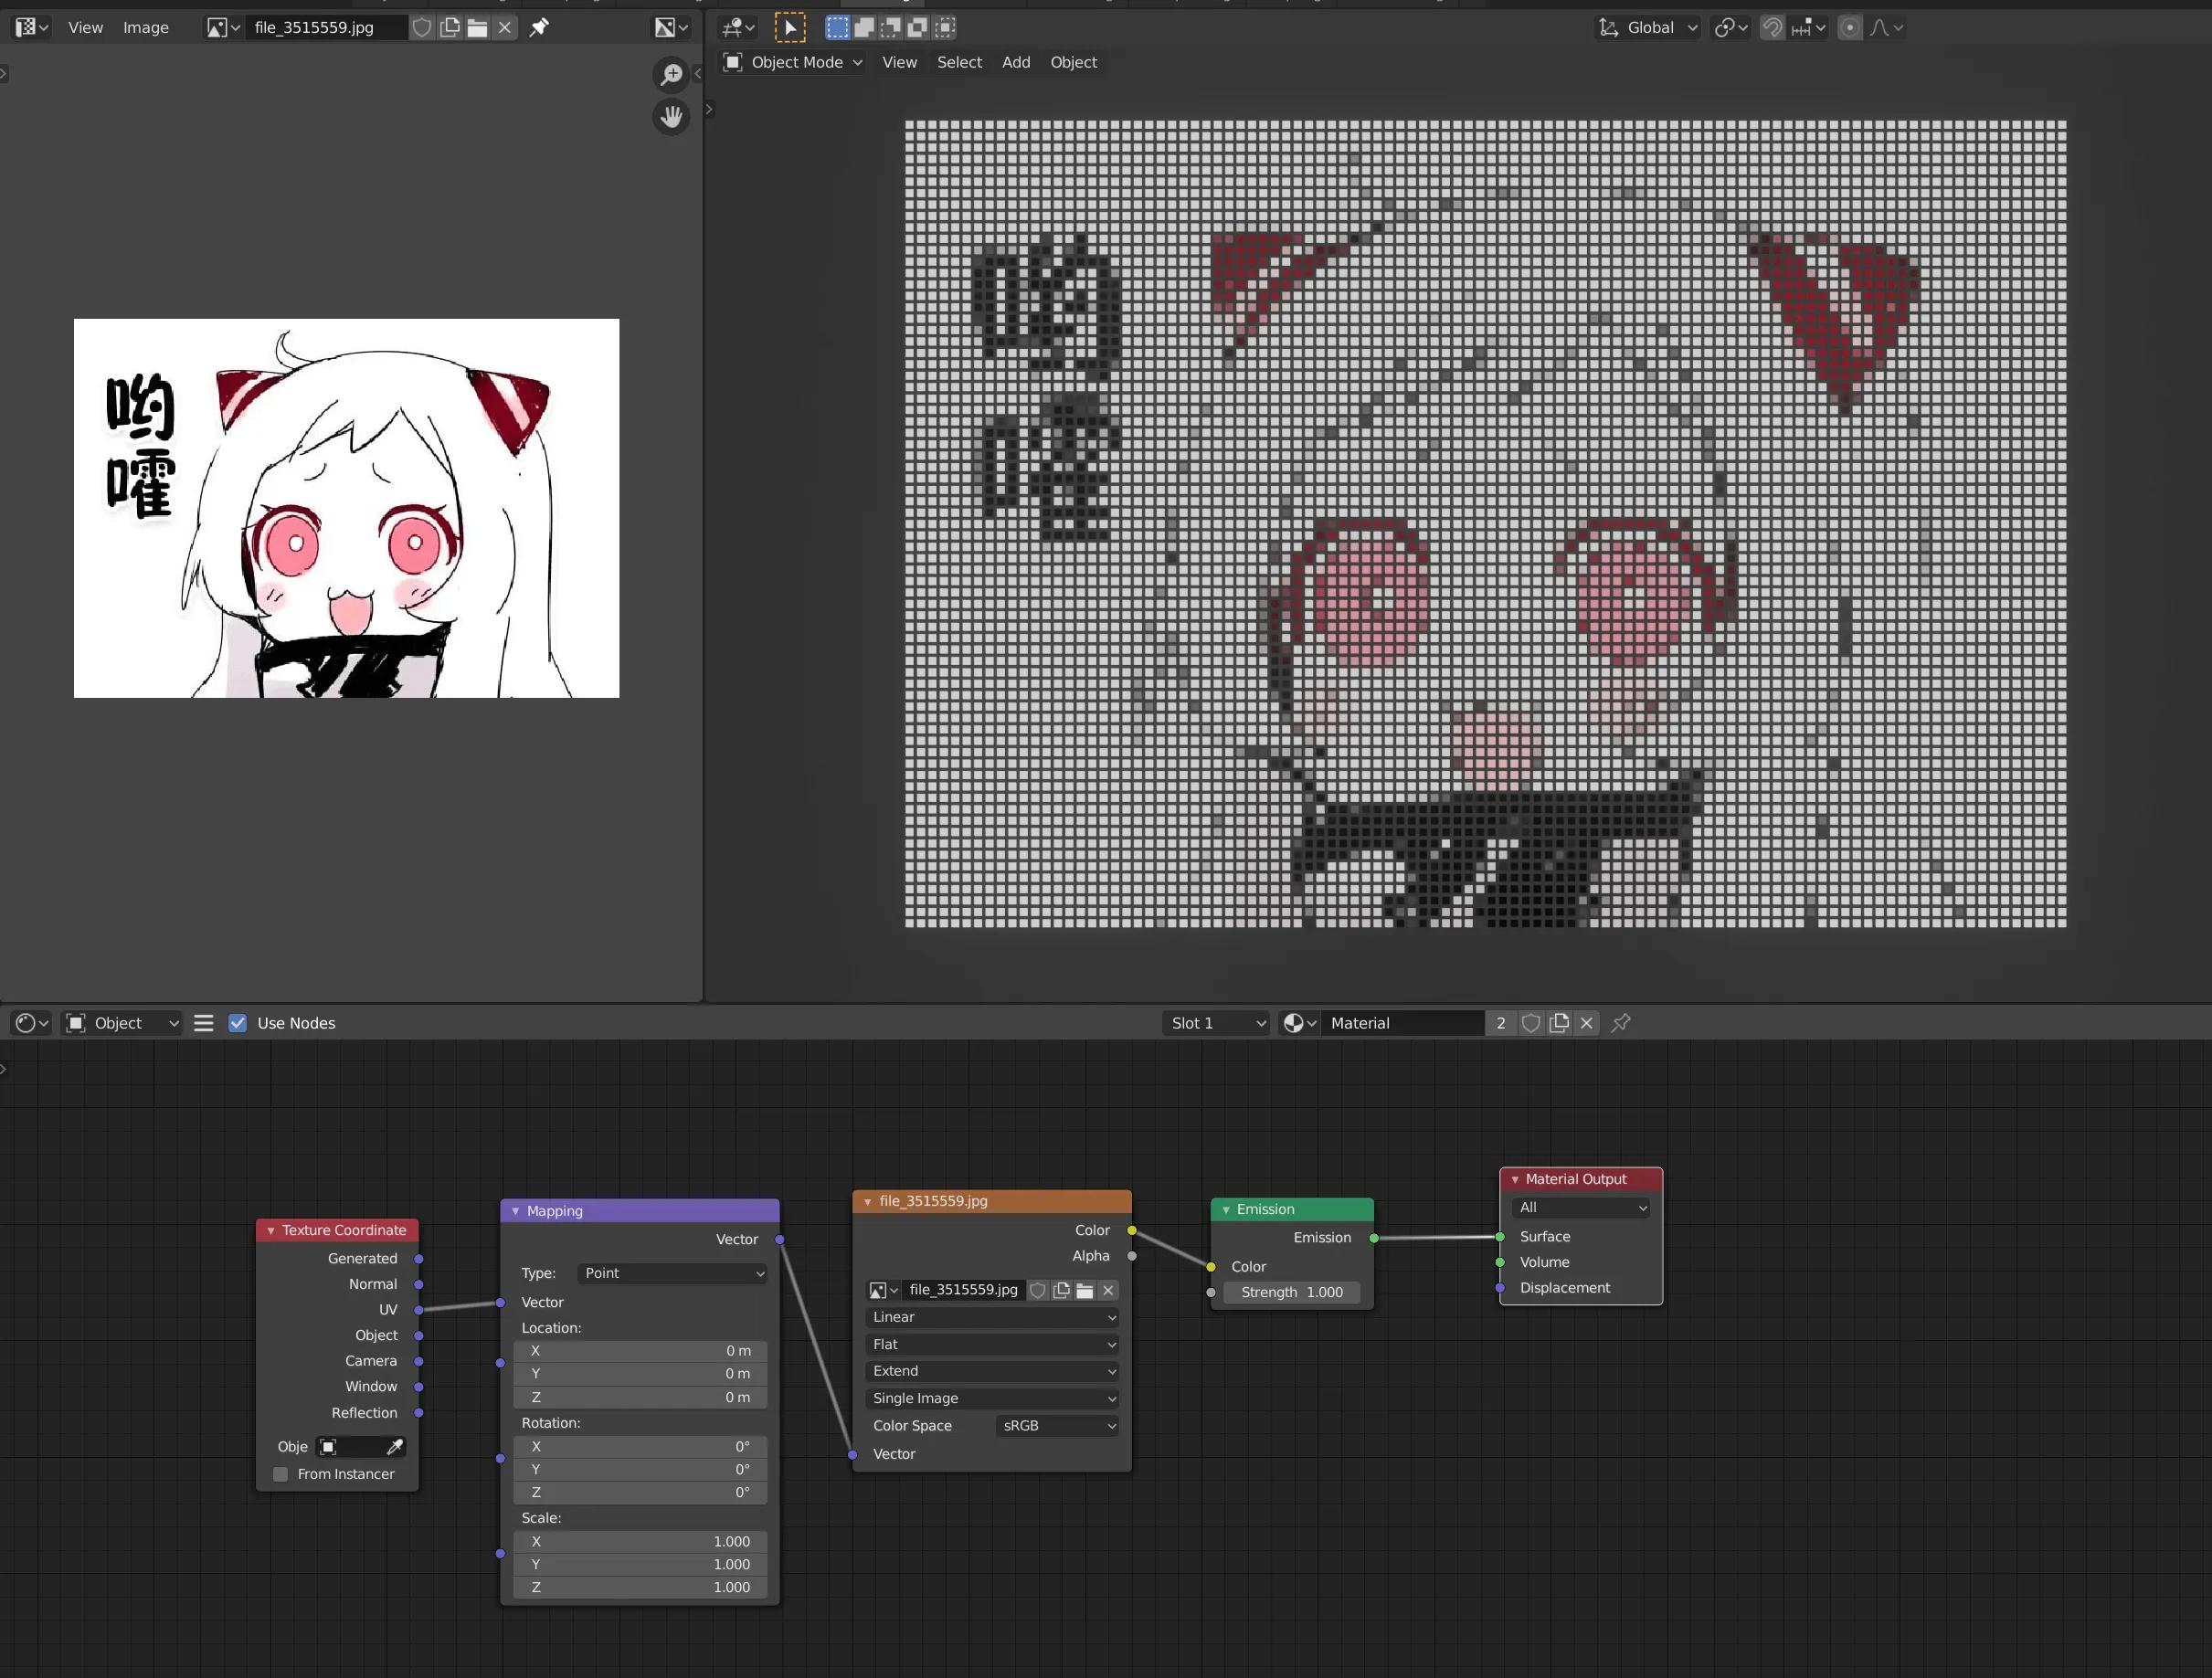
Result
Left is the normal image, right is the pixelated effect.
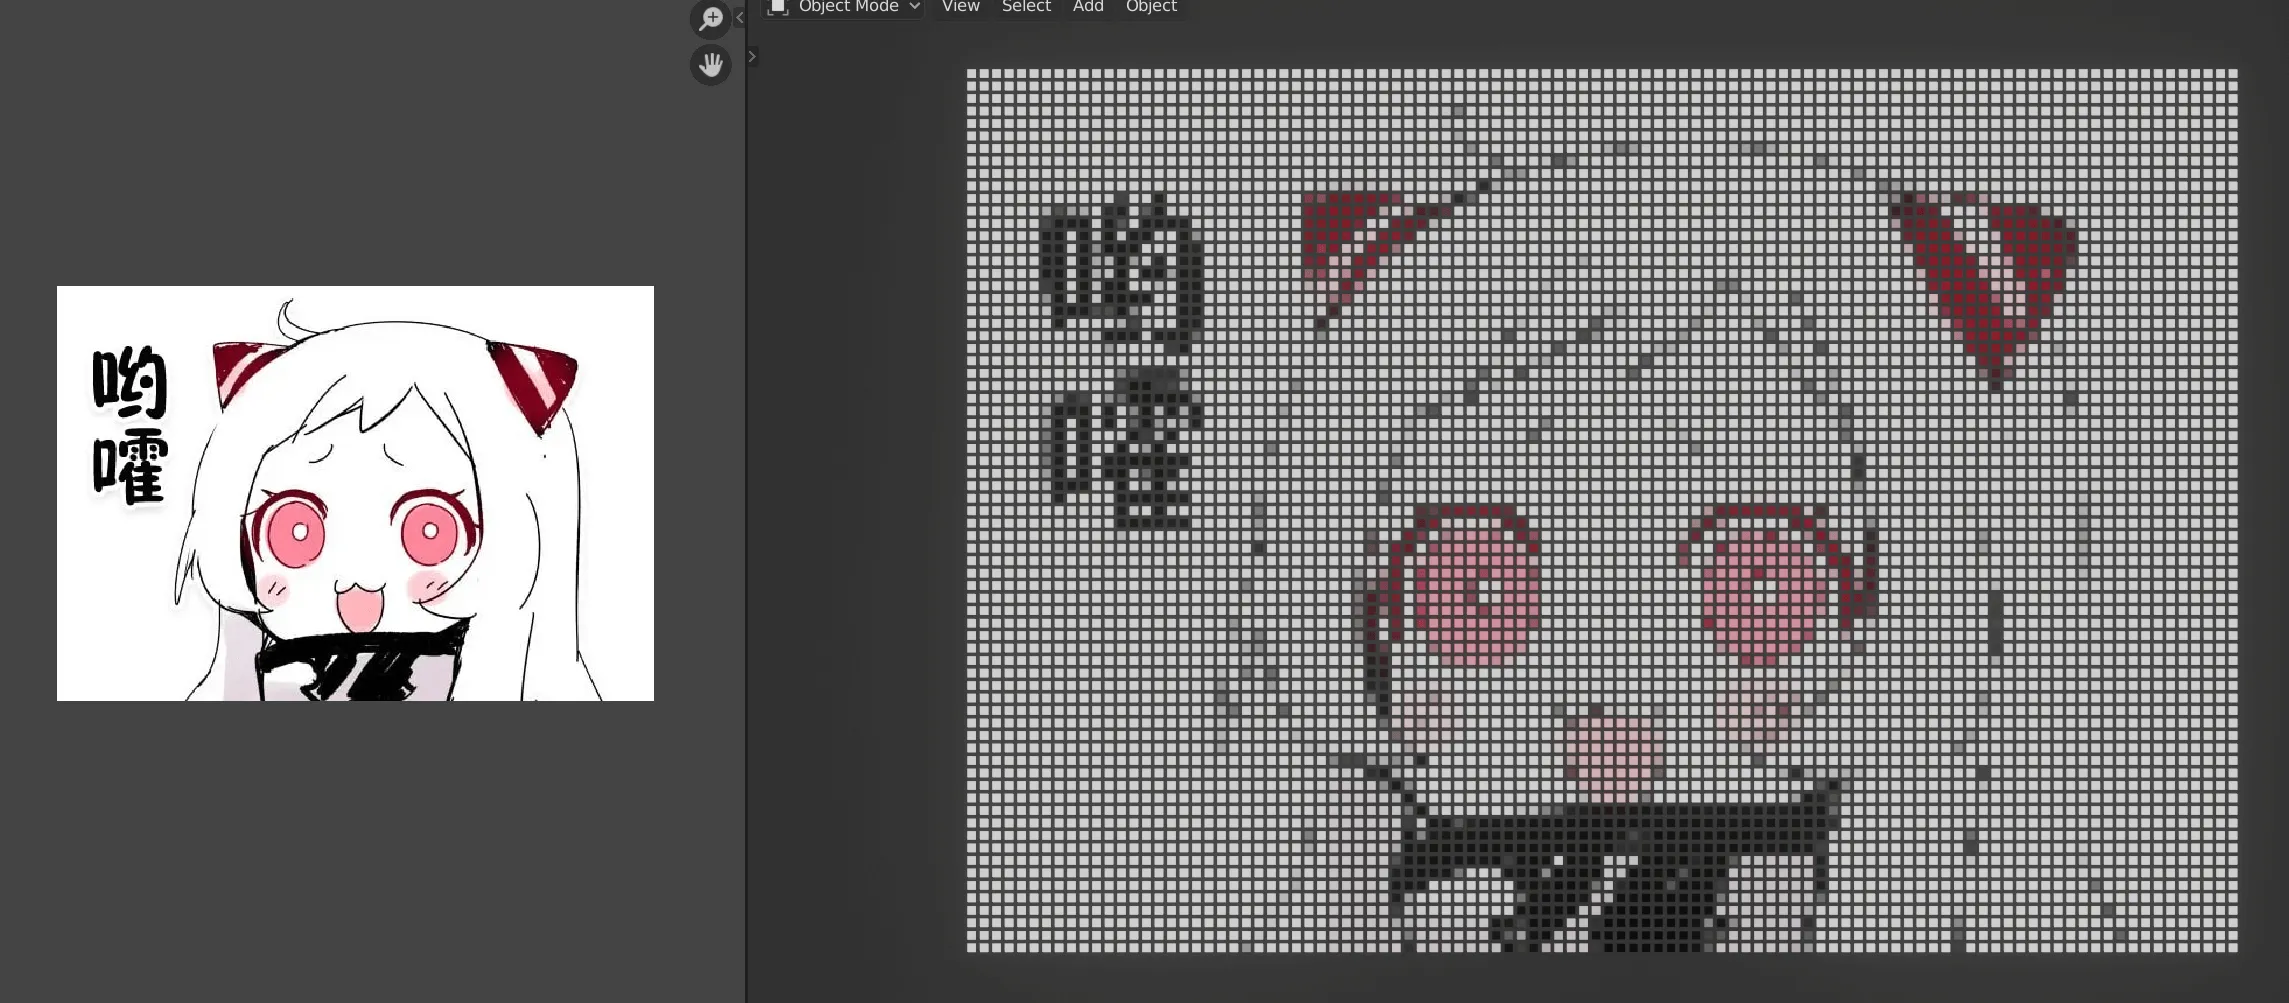
Zoomed in, you can see each cube has its own single color.
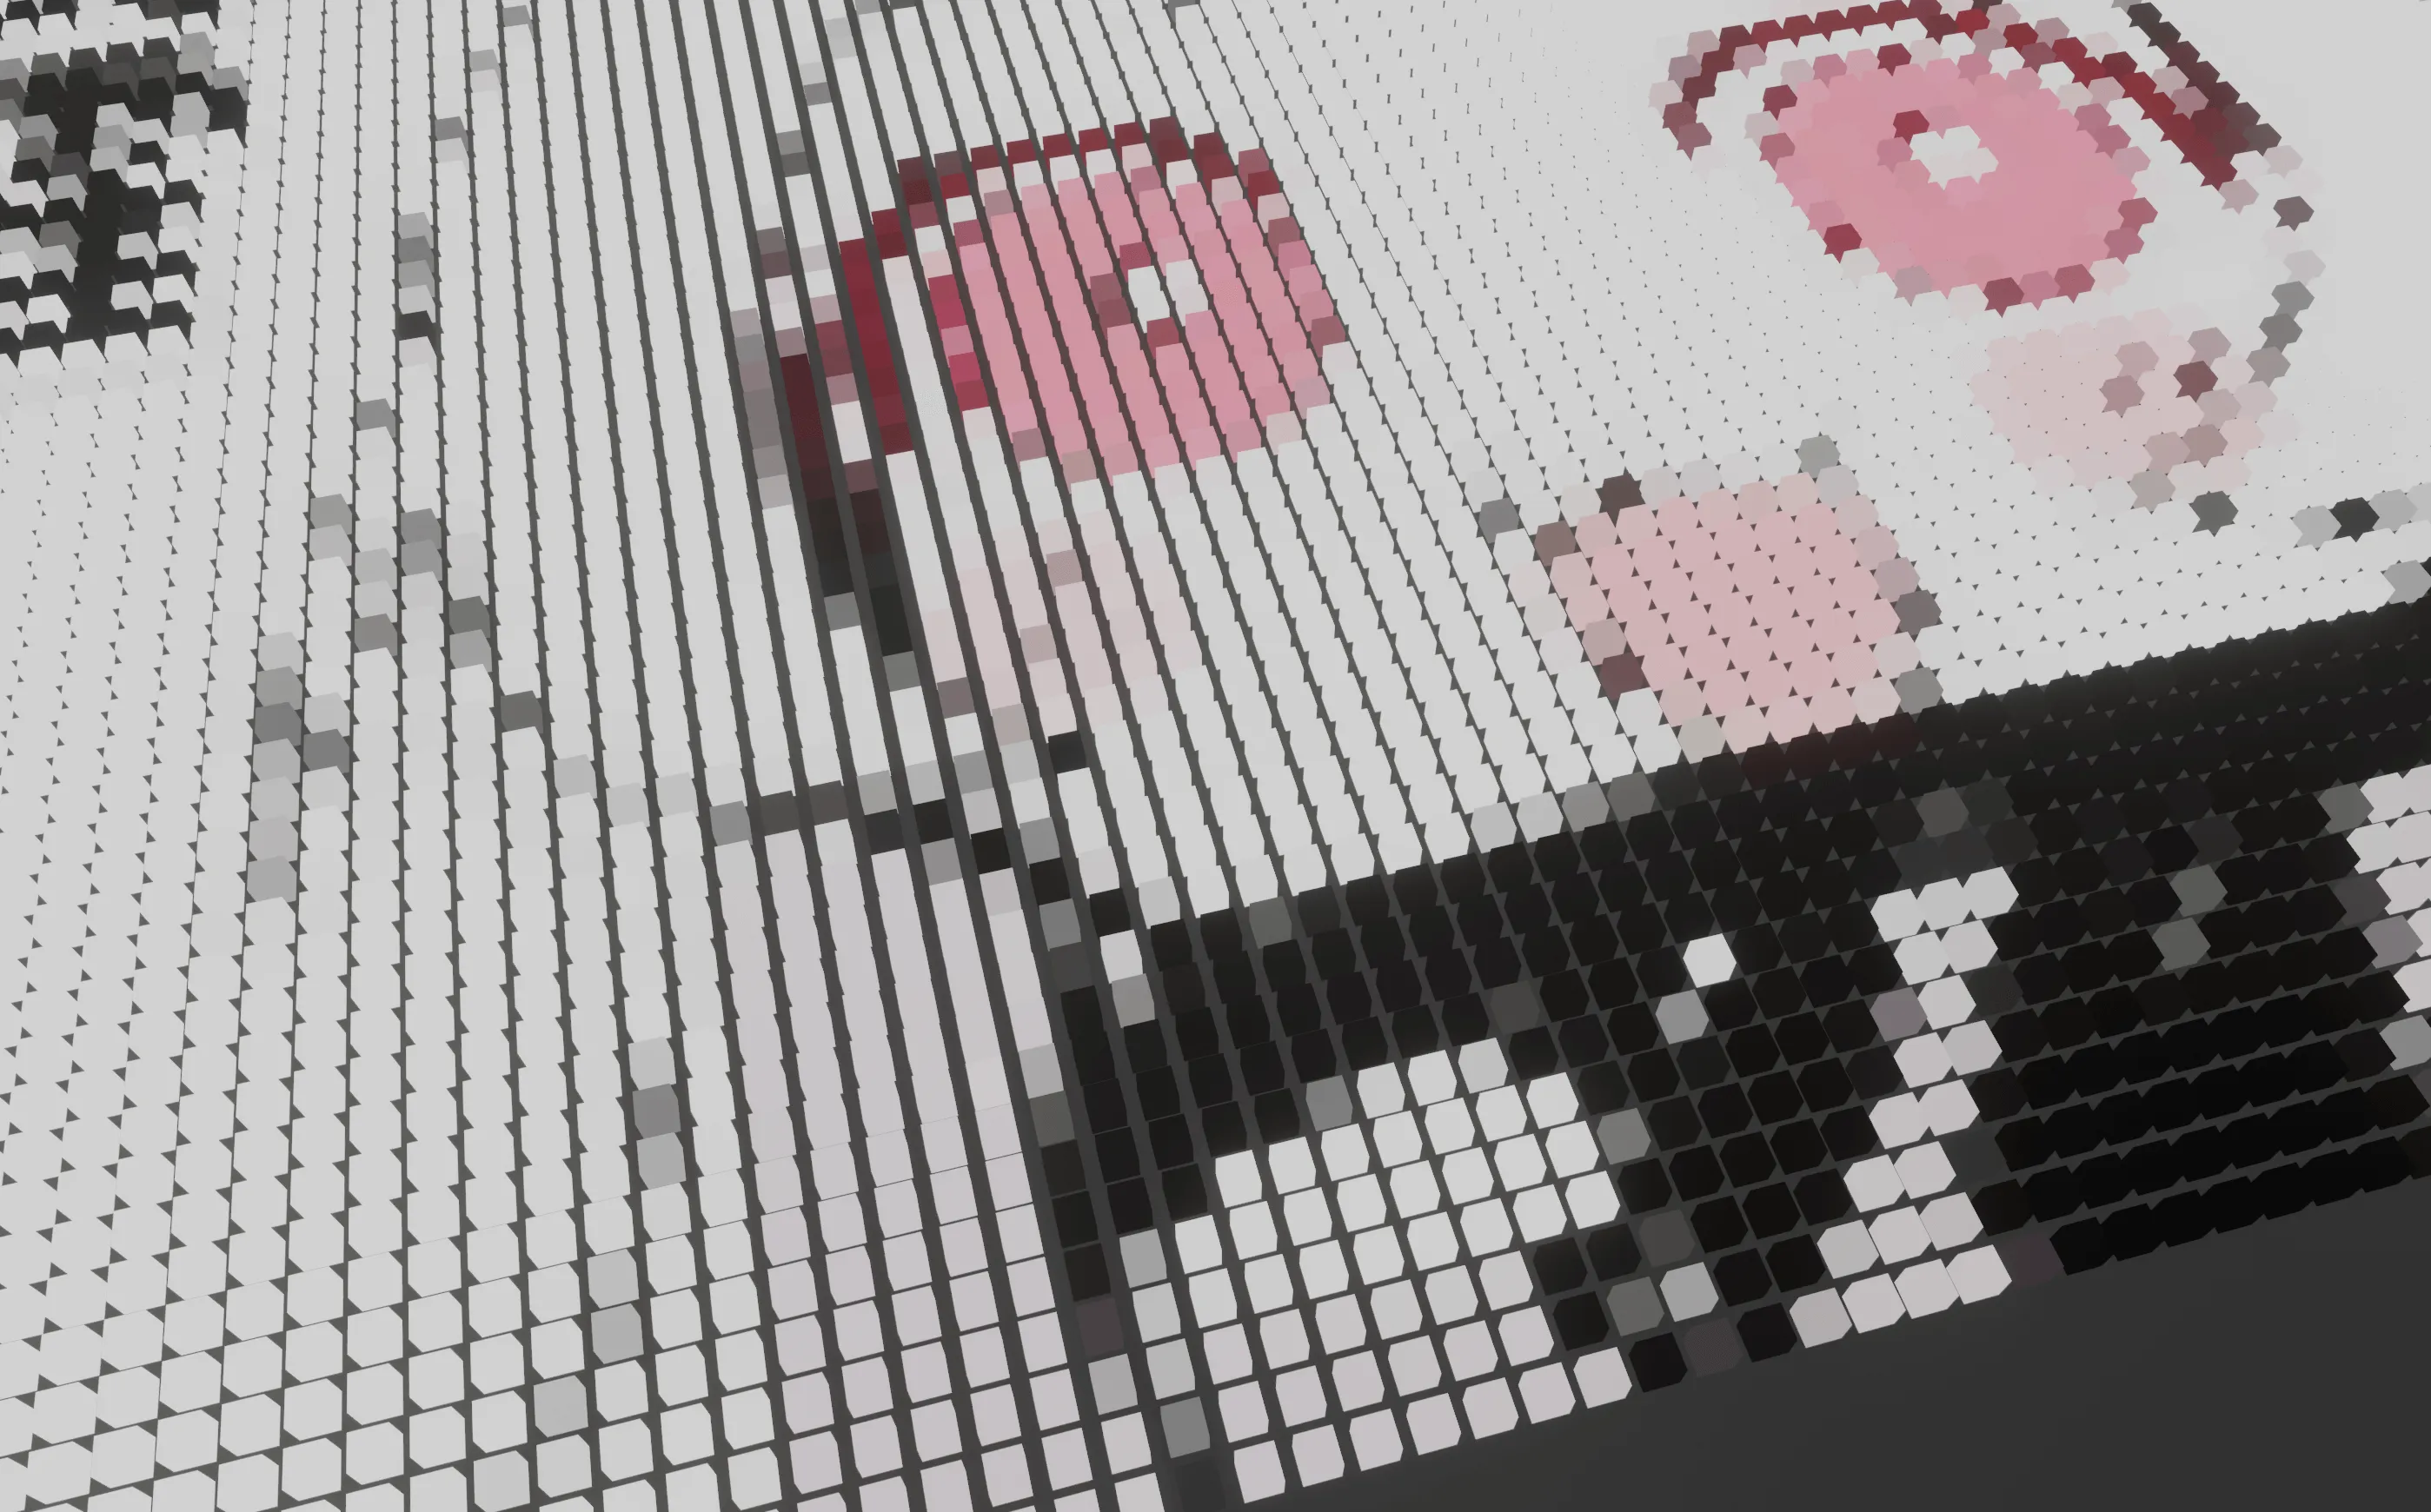
The core idea is simple: make each small cube show only a single flat color.
(This method comes from Ducky 3D’s tutorial “Blender - Easy Blinking Lights Animation in Cycles and Eevee”. It’s a clever trick, and I’m mostly just repeating it.)
Method
- Add an Array modifier to the cube. Set count and spacing to something reasonable (I set the count based on the image aspect ratio).

- Apply the modifiers one by one (important, so each cube becomes an independent element).
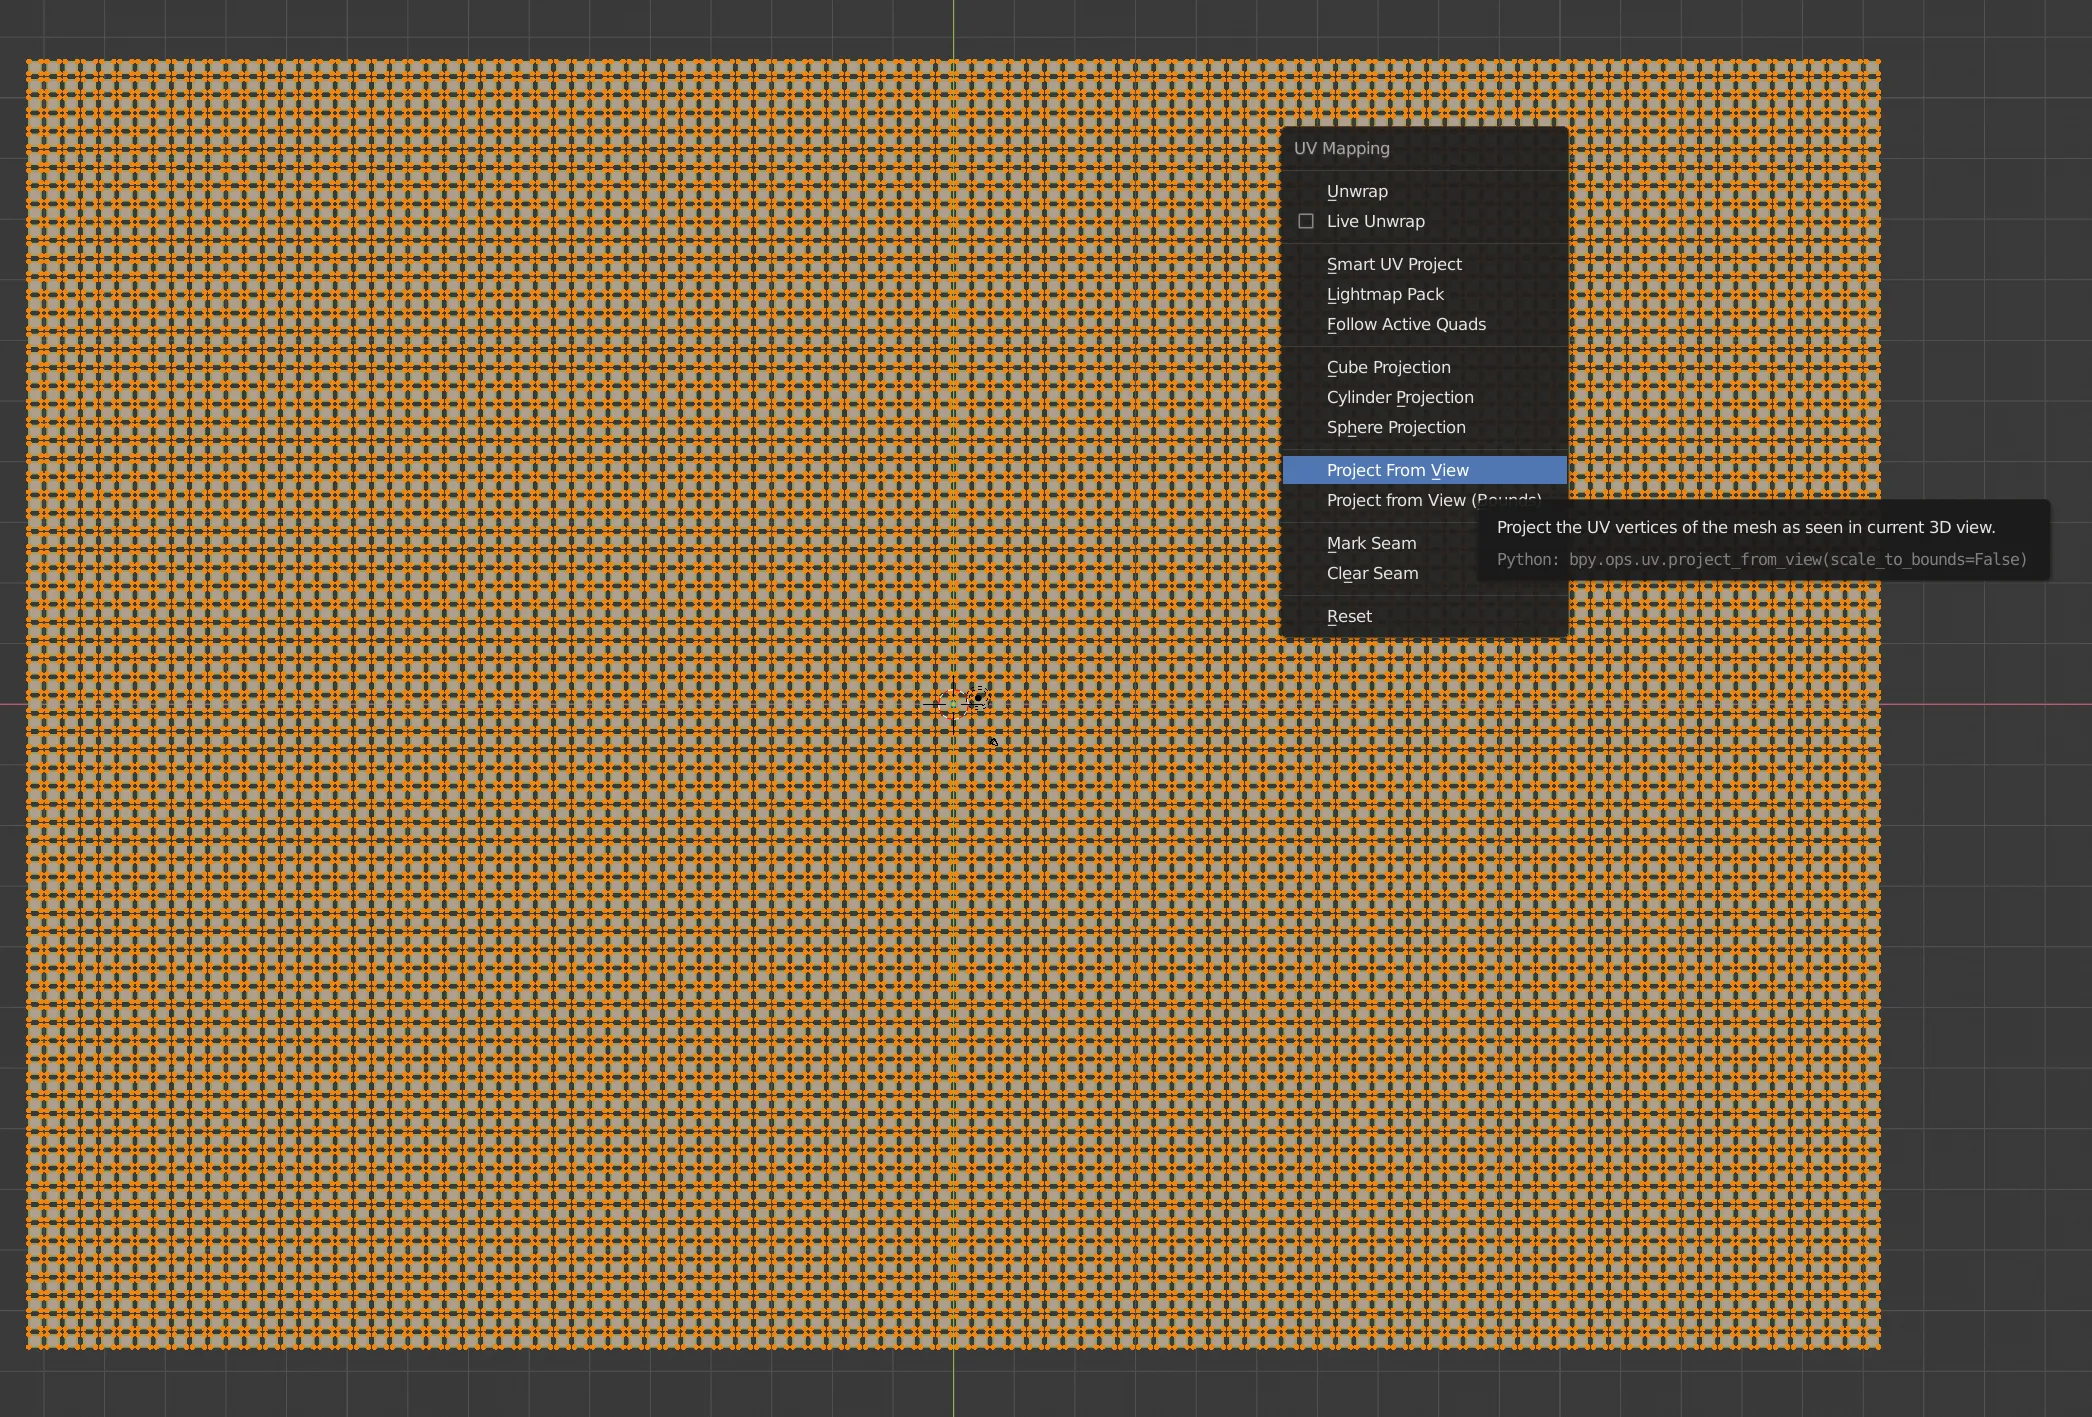
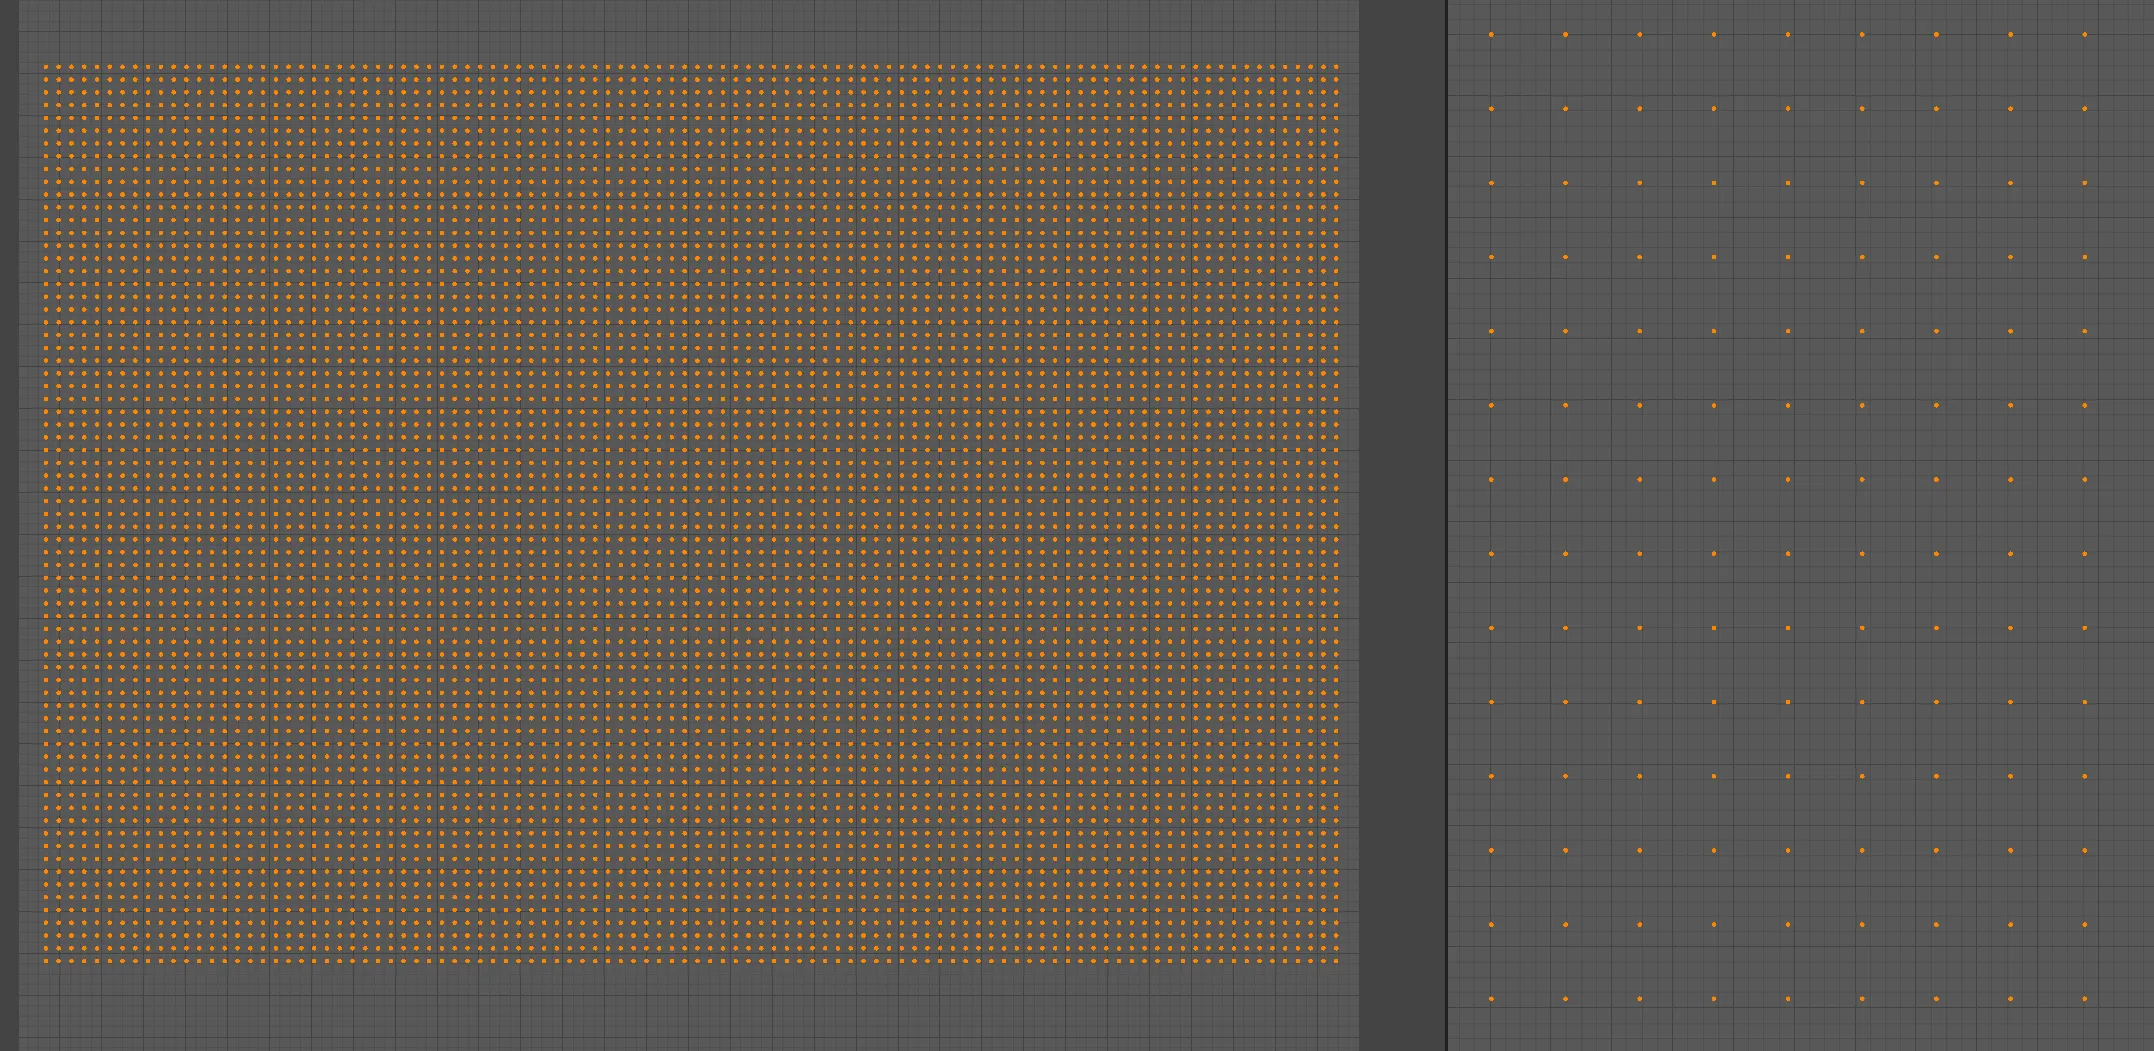
- In Edit Mode, switch to top view. Unwrap with
U, chooseProject from view.
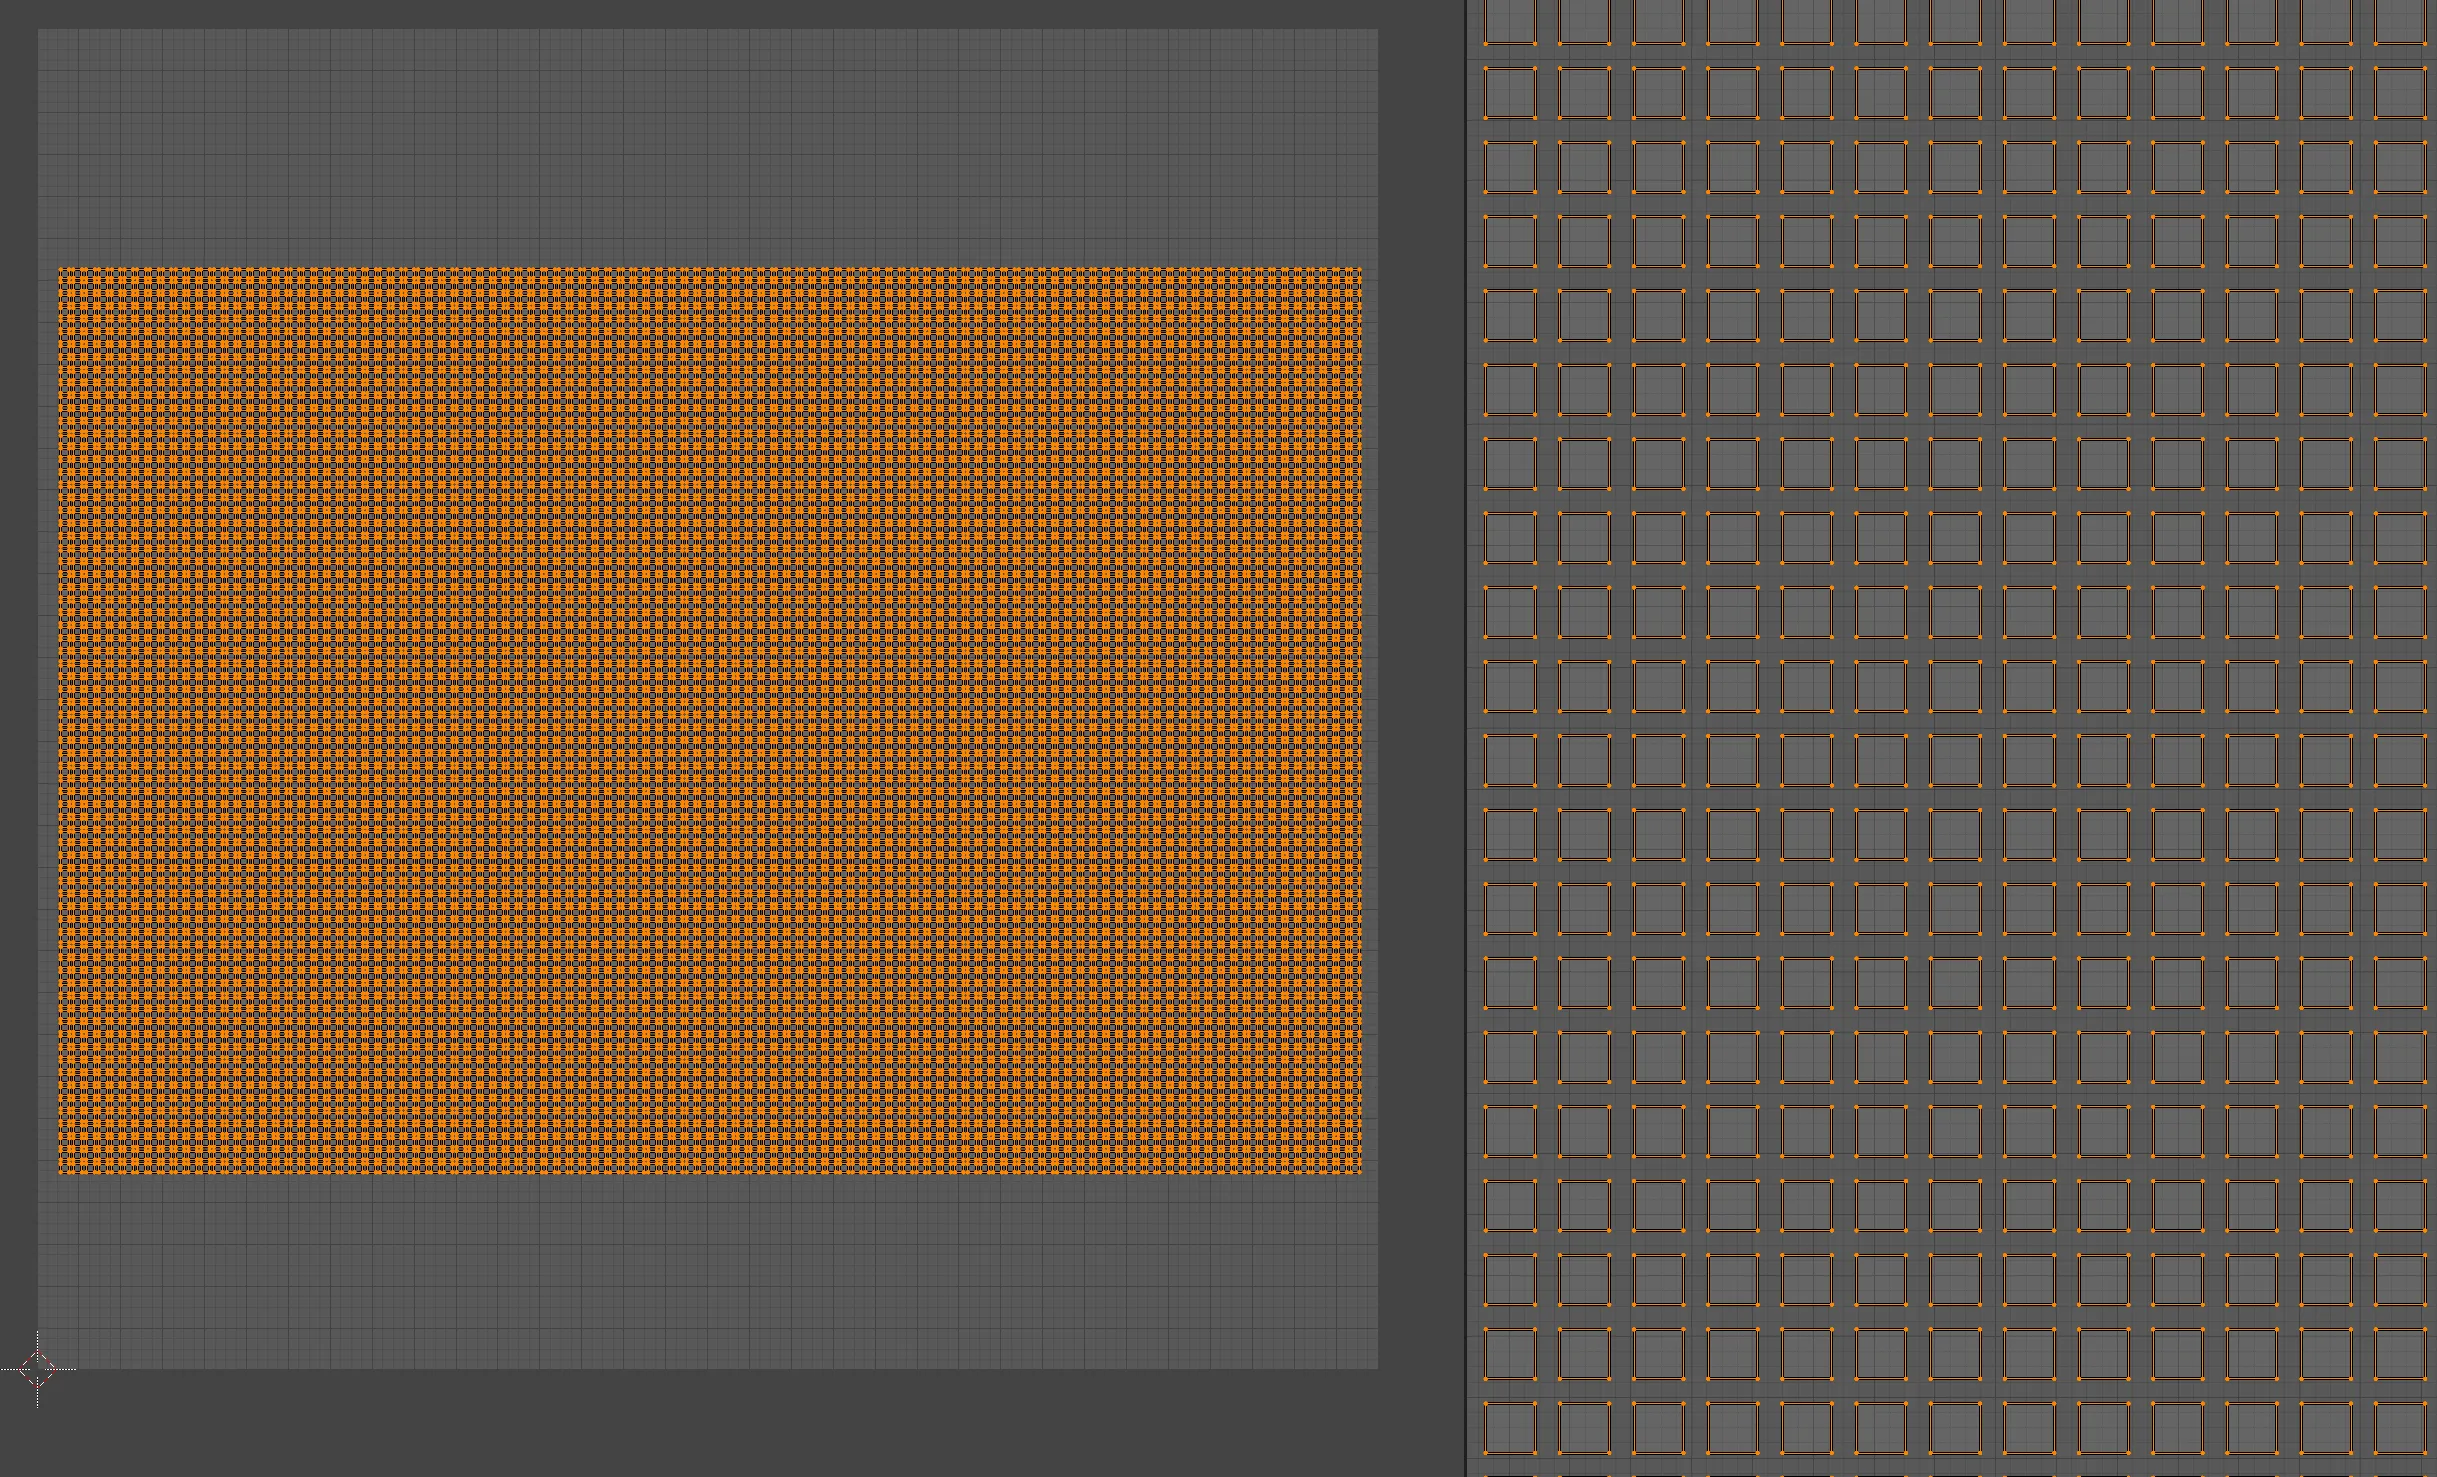
- In the UV editor, you’ll see the array’s UVs projected from the top view onto the plane (on the right is a zoomed view: small squares arranged into the effect on the left).
- Set
PivottoIndividual Origin, then pressSand scale to0(each cube will scale down around its own center).
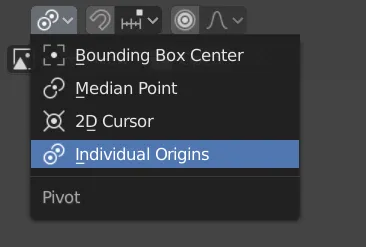
- Now each cube’s UV collapses to a point.
- Add a material. You can use procedural textures, or use an image texture (just drag any image in as an example).
This is just one idea. How you use it is up to you.
(I recently finished Ducky 3D’s tutorials and took some notes, but the videos lean toward small tricks and are a bit fragmented. I may post those notes slowly, one by one, like this.)
2019/11/26 update
miao miao miao
Comments